I've just started a Mr. Chicken Facebook page!
I hope to keep this blog as the main source of projects and news, but the Facebook page will give some folks an easier way to keep tabs on what's new. Head on over and give it a "like" to stay in the loop!
Mr. Chicken's Prop Shop on Facebook
EDITED 2015 to reflect new URL
Saturday, November 2, 2013
Friday, November 1, 2013
Another Low-Key Halloween
Tried out a little ghoul makeup in the morning:

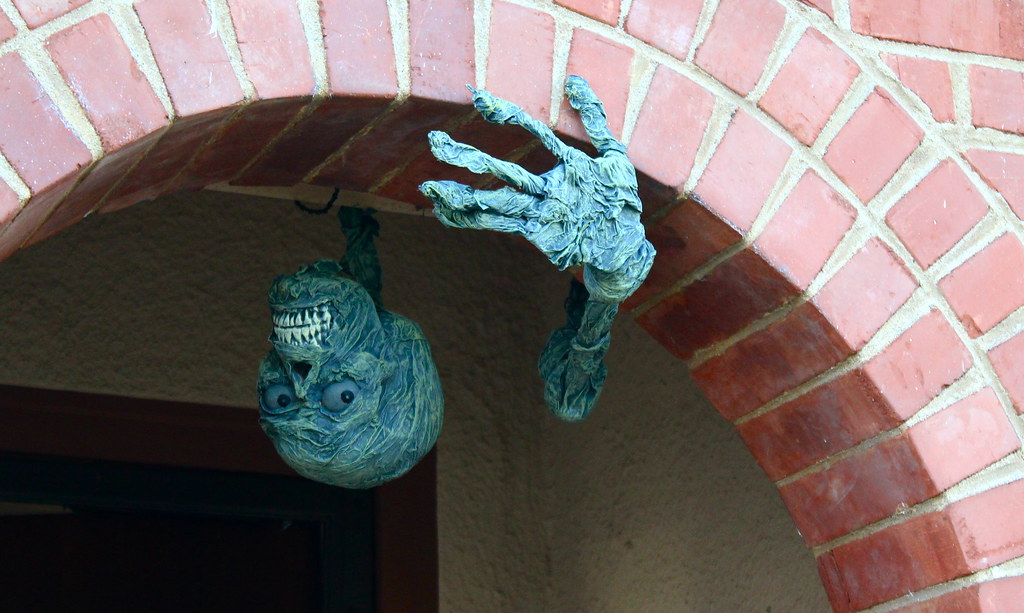
Affixed the new Porch Peeper Zombie in the archway:

And watched An American Werewolf in London with spiders on our heads:

Roughly 30 Trick or Treaters this year.

And watched An American Werewolf in London with spiders on our heads:

Roughly 30 Trick or Treaters this year.
Tuesday, October 29, 2013
A Little Gore Before Halloween
I was recently asked to help out on a short film doing a particularly weird, creepy, gory character makeup. The only problem was, I wouldn't be available for the duration of the shoot to apply and remove the makeup each day. The solution I worked out was to make a flexible silicone copy of the actor's face with all the "makeup" applied, that he could wear as a mask. Did that sound confusing? Let me try it again. The actor wore a mask of his own face, but gory. Make more sense?
I took a lifecast of the actor's face by pouring melted clay into the mold we made of him, and was able to carve the wounds and...weird stuff directly into it.

Then I molded that and painted in a few layers of a soft silicone (so that he would be able to emote somewhat through the mask).

Some paint...

Some slime (which was actually just more silicone so it would be totally solid and non-sticky)...

Tie on a couple elastic straps, and he's good to go!

It's not the best method, mind you, but for four evenings of work, it works pretty well.
Monday, October 28, 2013

Saturday, October 19, 2013
The Halloween Bug
I caught the itch to make something spooky these last few days before Halloween. We'll see where it goes. Doodle today, prop tomorrow?


Monday, October 7, 2013
Free Castle and Village Facades - Southern California
Free to a good haunt!
I created these set pieces for a student film about a fantasy Princess who is transported from her world into ours, and now we need to get rid of them. They need to be claimed by Monday the 14th, or we'll have to take them to the dumps.


They're located in Orange County, CA. You'll need to bring a truck to transport them.
Most of the construction is fire-retardant-treated foam, and will break down into manageable pieces. The castle measures approx. 12' tall and 32' long, for reference.
Bonus: we'll be ageing the set to suit the final battle scene of our film, so it will be very haunt-ready when you get them!
Contact me at ChickenHaunt [at] gmail.com
P.S. Yes, I'll have plenty of progress photos for the rest of you later on.
I created these set pieces for a student film about a fantasy Princess who is transported from her world into ours, and now we need to get rid of them. They need to be claimed by Monday the 14th, or we'll have to take them to the dumps.
They're located in Orange County, CA. You'll need to bring a truck to transport them.
Most of the construction is fire-retardant-treated foam, and will break down into manageable pieces. The castle measures approx. 12' tall and 32' long, for reference.
Bonus: we'll be ageing the set to suit the final battle scene of our film, so it will be very haunt-ready when you get them!
Contact me at ChickenHaunt [at] gmail.com
P.S. Yes, I'll have plenty of progress photos for the rest of you later on.
Thursday, September 19, 2013
Castles and Hat Shops
Yep, it's that time of year again. No, not Halloween. Time for movie making!

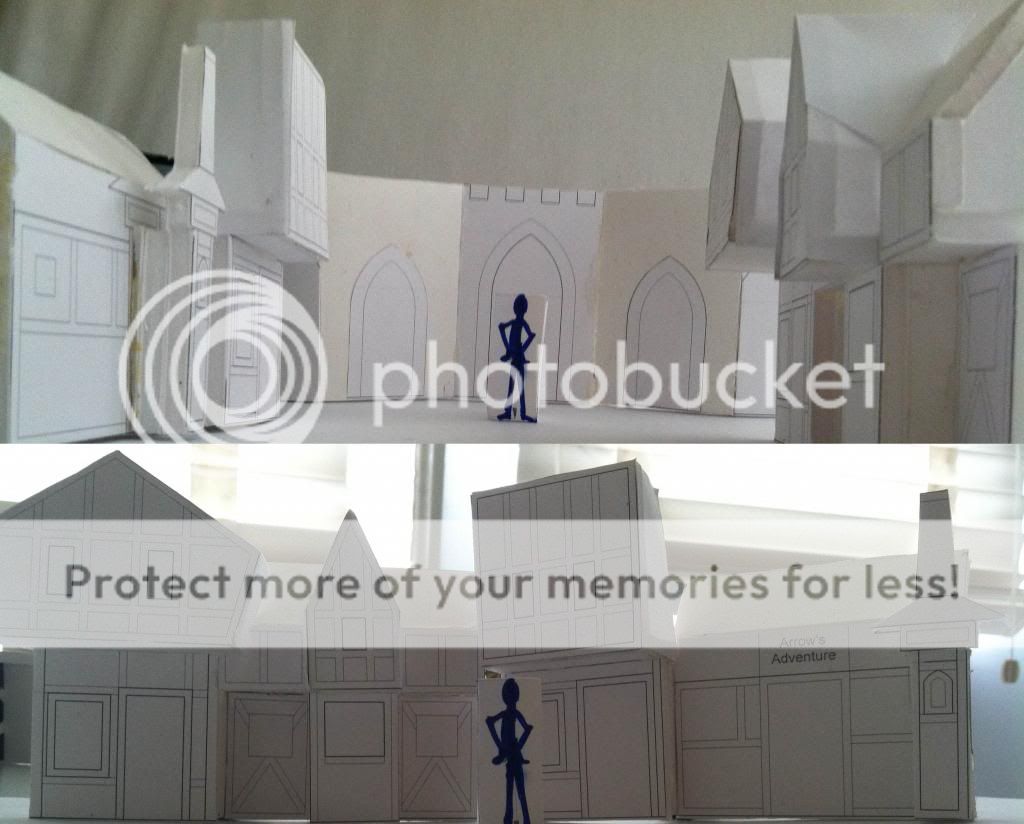
This year I'm the production designer for a student film that's set in a Disneyland-type theme park, complete with castle and cartoonish Tudor-style souvenir shops. Above is the little model of what it will be like. It's certainly shaping up to be the biggest set I've ever built.

This year I'm the production designer for a student film that's set in a Disneyland-type theme park, complete with castle and cartoonish Tudor-style souvenir shops. Above is the little model of what it will be like. It's certainly shaping up to be the biggest set I've ever built.

That's the castle in progress. I think it's turning out rather nicely, for a few sheets of foam.
So, why am I posting about this here? Two reasons.
One, we're raising money. If you'd like to help fund the last production design project of my college career, head on over here: http://www.indiegogo.com/projects/princess-in-the-park. There are only a couple of days left, though, so send your pennies soon!
Two, if you're in Southern California and would like to have the set when we're done (final shoot day is Oct. 13-- just in time to add it to your haunt), shoot me an email at ChickenHaunt [at] gmail.com. If you don't take it, it's going to the dumps!
Friday, September 13, 2013
Last Chance!
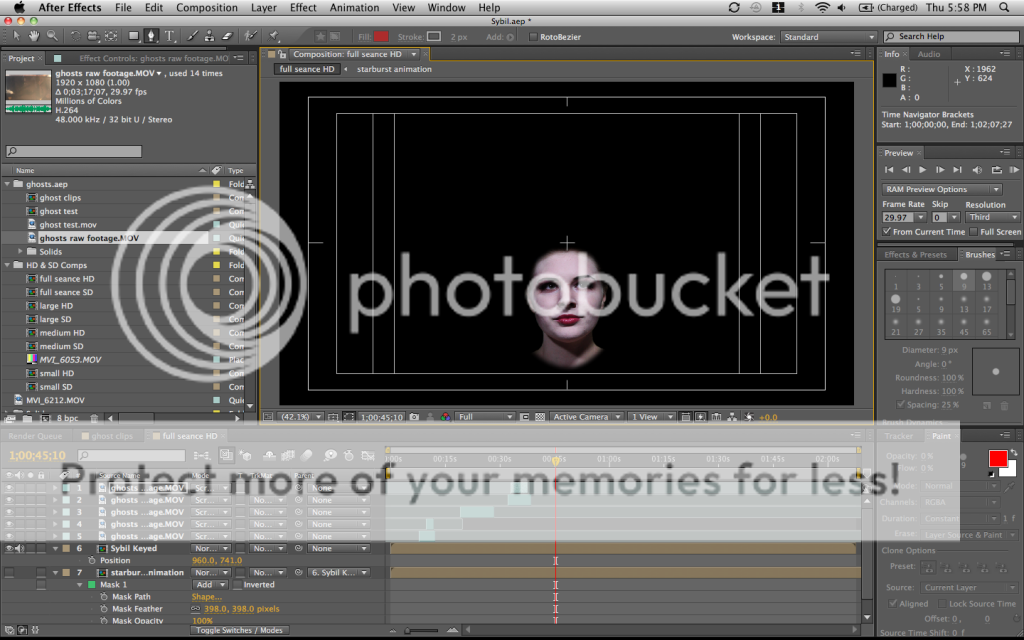
Don't miss out on getting Sybil the Clairvoyant for your haunt this year!
The last day to order for pre-Halloween 2013 delivery is this Sunday, September 15.
Click HERE for more videos and info.
The last day to order for pre-Halloween 2013 delivery is this Sunday, September 15.
Click HERE for more videos and info.
Sunday, September 1, 2013
Time's Running Out!
Only two weeks left to order Sybil the Clairvoyant in time for this Halloween! Orders received after September 15 will not be shipped until November.
Sunday, August 11, 2013
New Video! Using a Cheap Projector
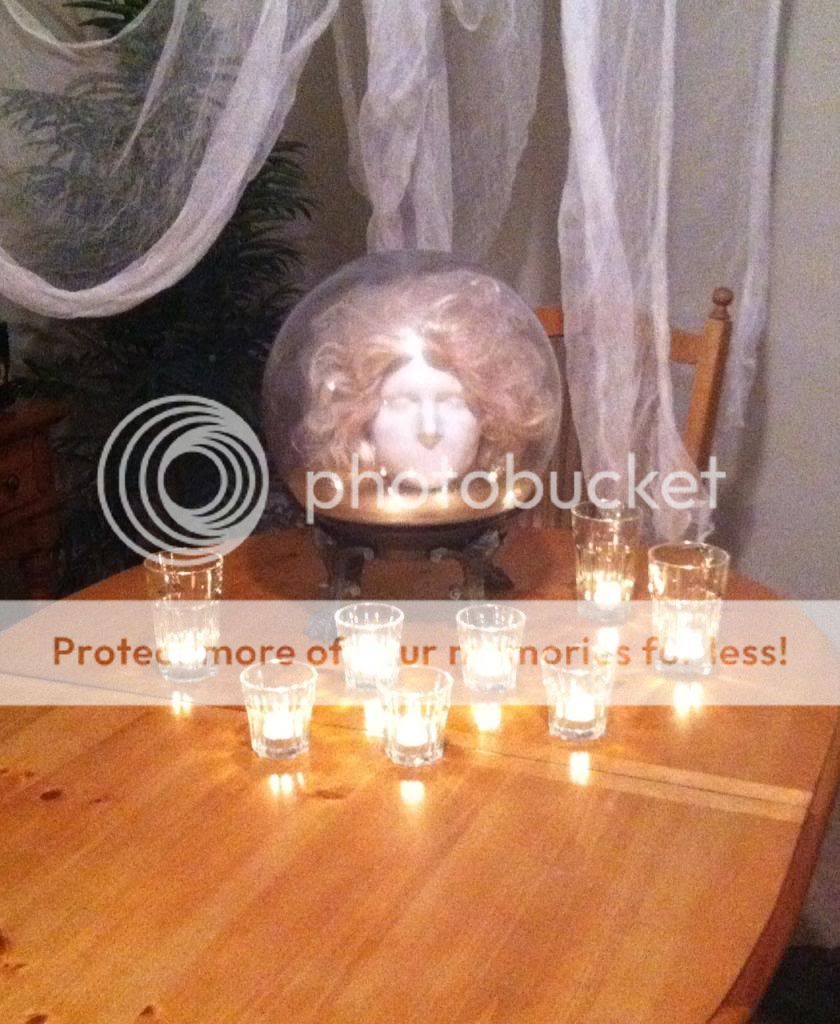
Using a cheap projector and thinking outside the box with my Sybil the Clairvoyant projection effect.
Just to give y'all some more ideas...
Just to give y'all some more ideas...
Saturday, August 10, 2013
Sybil on the Move

Monday, August 5, 2013
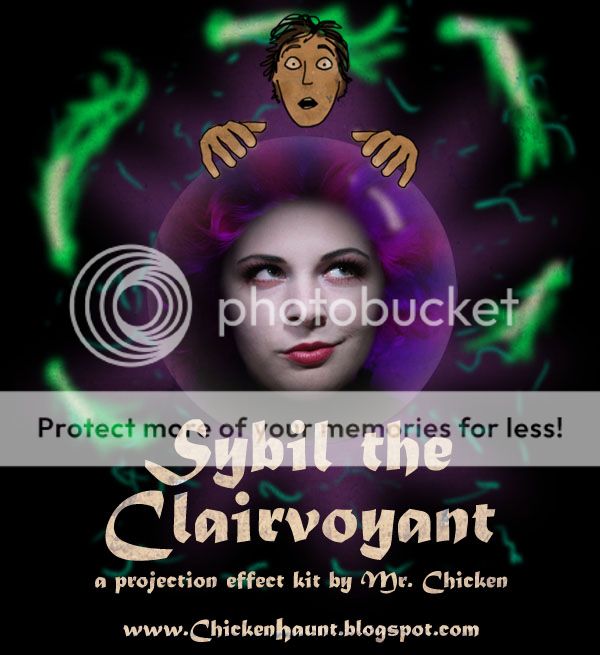
Presenting...Sybil the Clairvoyant, My New Projection Effect
It's here! My updated version of the disembodied medium projection effect.

Sybil the Clairvoyant is a professional quality projection effect kit that anyone with access to a video projector can do. You simply project the DVD onto the included head form, and watch your guests become completely mesmerized by this incredible illusion. Sybil conducts a séance that's sure to impress.
Watch the demo video below to see all the cool, creepy effects, and click HERE for the how-to video and more information about how to set up and display Sybil, PLUS how to get your hands on a kit!
Friday, August 2, 2013
Testing...1, 2, 3...
Editing, Compositing, Sound Design
Lots to do, but it's getting closer!
Here, have a screenshot.
 Whaa?? What's she doing way down there in the bottom of the frame?? Hmm....
Here, have a screenshot.
Thursday, August 1, 2013
Filming Day
A little teaser from the shoot today:


This isn't how the actual video will be edited, but it'll give you an idea...
Sunday, July 28, 2013
Using the Vacuum Former
Some of you may have heard rumblings of a replacement in the works for the DIY Madame Leota projection effect I helped popularize a few years ago. Well, it's very close to complete, so I thought I'd share the progress.
I had two main issues with the Madame Leota effect. 1) It's Disney's, so it would never be truly "mine," no matter how well I replicated it. 2) It's practically impossible to replicate it perfectly, since, though the video is easy to find, projecting Leota's face onto anything but her actual head will result in some funky distortion.
The solution: build my own version from the ground up.
You've already seen the first stage, my vacuum forming table. Here's what comes next.
The head form that I project onto needs to actually be the head of the actress in the projection video. So I made a plaster lifecast of her head, which comes out like this:

And then I modified it to suit a projected face, reducing detail to what needs to be there to register the face properly, and removing what would get in the way.

But I don’t want to project on a heavy plaster head form. I want a lightweight copy of it.
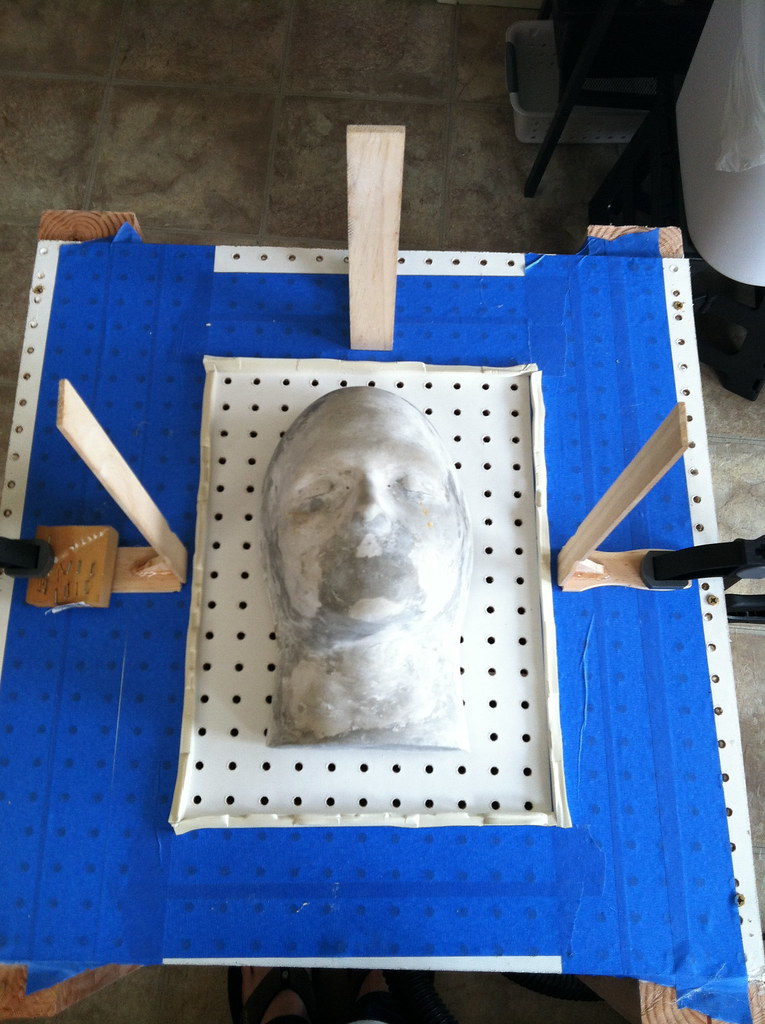
So I put the head form (called a “buck” in vacuum forming) on the table. The paint sticks are guides so I can put the frame into the right place.
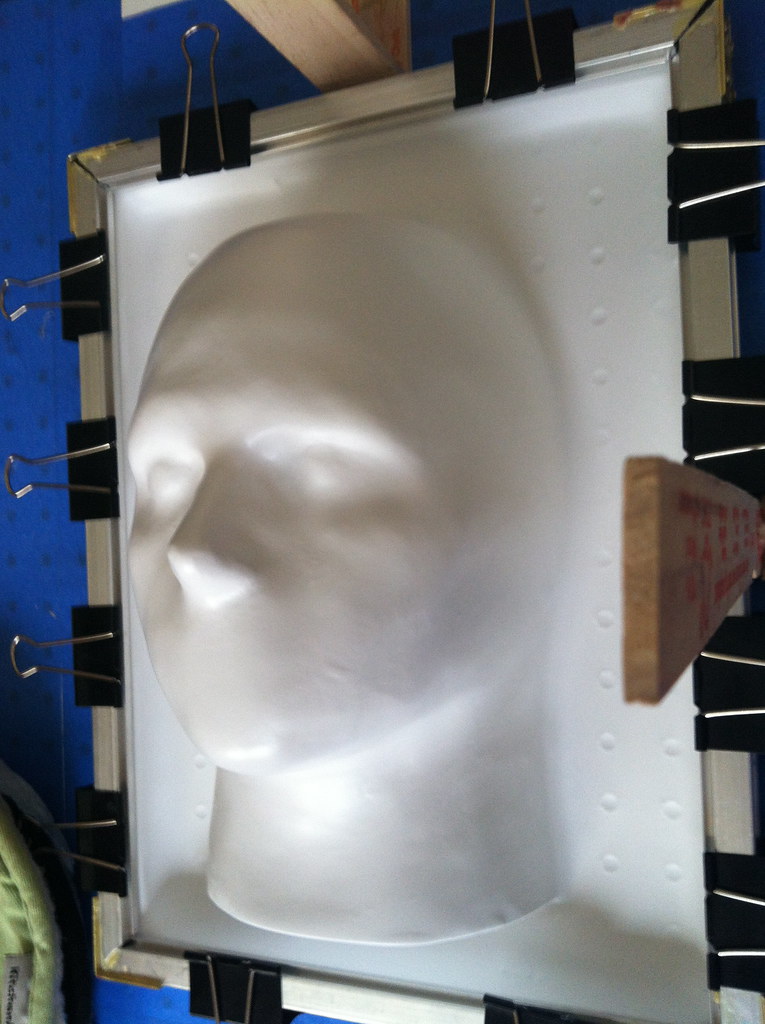
Then take the heated plastic out of the oven, press the frame down until the vacuum suction engages, and bam! A split second later, I have a lightweight, plastic head form to project onto.
Admittedly, it took a half dozen tries to get the machine figured out, but now that it's working, we're in business!
I had two main issues with the Madame Leota effect. 1) It's Disney's, so it would never be truly "mine," no matter how well I replicated it. 2) It's practically impossible to replicate it perfectly, since, though the video is easy to find, projecting Leota's face onto anything but her actual head will result in some funky distortion.
The solution: build my own version from the ground up.
You've already seen the first stage, my vacuum forming table. Here's what comes next.
The head form that I project onto needs to actually be the head of the actress in the projection video. So I made a plaster lifecast of her head, which comes out like this:
And then I modified it to suit a projected face, reducing detail to what needs to be there to register the face properly, and removing what would get in the way.
But I don’t want to project on a heavy plaster head form. I want a lightweight copy of it.
So I put the head form (called a “buck” in vacuum forming) on the table. The paint sticks are guides so I can put the frame into the right place.
Then take the heated plastic out of the oven, press the frame down until the vacuum suction engages, and bam! A split second later, I have a lightweight, plastic head form to project onto.
Admittedly, it took a half dozen tries to get the machine figured out, but now that it's working, we're in business!
Wednesday, July 10, 2013
Vacuum Forming Table
I don't know about you, but I've always wanted a vacuum forming machine. You take a sheet of plastic, heat it up, and shrink-wrap it over an object you want to copy. If I had a dollar for every time I could have simplified a project by running off a thin plastic shell of something...well, I would have saved up enough to build one. So I figured, that's a silly statistic, and I built one anyway.
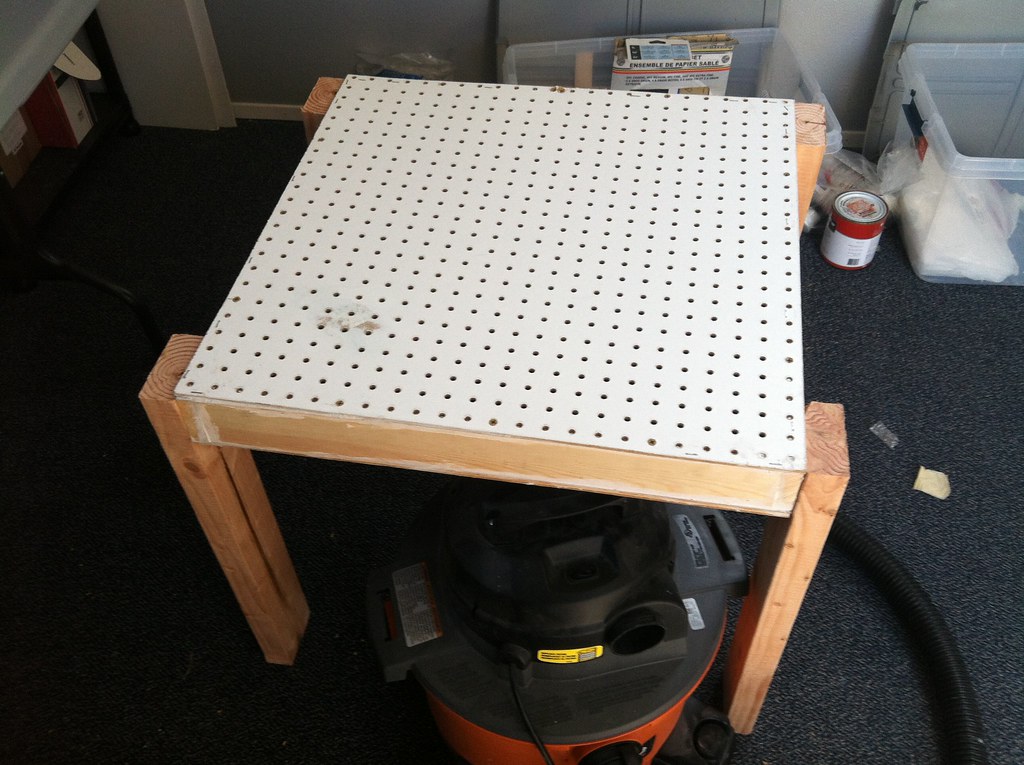
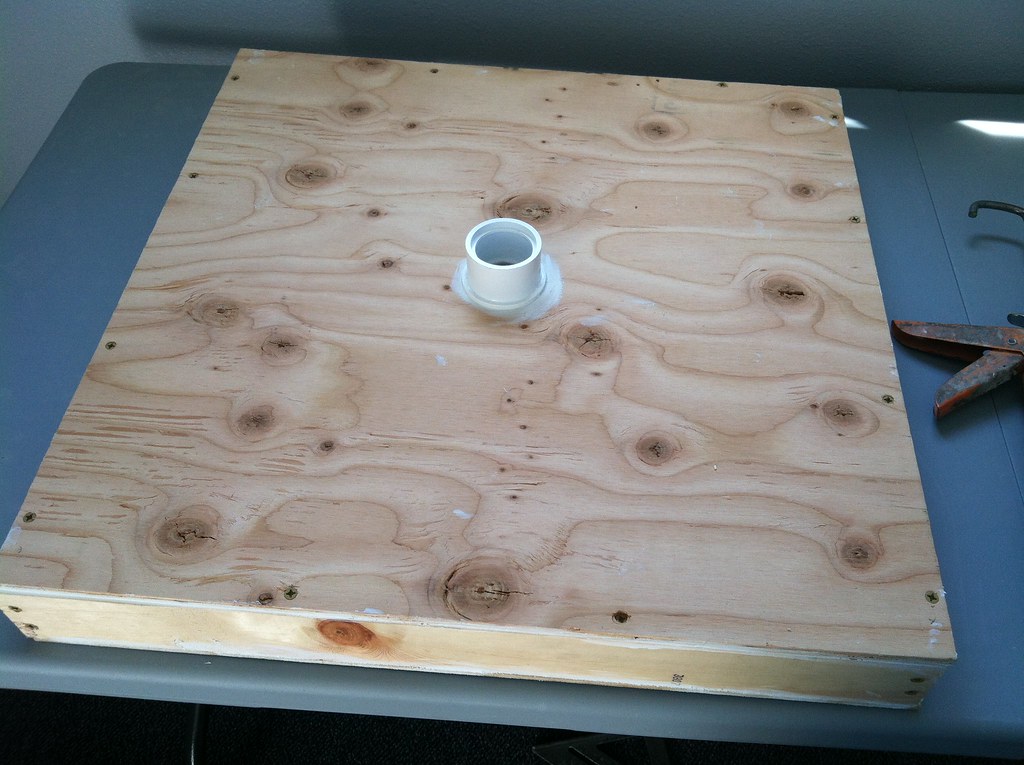

I'll be using the kitchen oven to heat the plastic, so I only needed to make the vacuum table. The table is actually a box that hooks up to my shop vac, so it sucks the softened plastic down. It's 2' square, with a pegboard top, 1x2 sides, and plywood for the bottom. The legs are 2' 2x4s.
I found a PVC fitting that fits my shop vac hose perfectly. It's some kind of reducer that I just adhered with caulk over a hole in the middle of the plywood.
It hooks up like this.
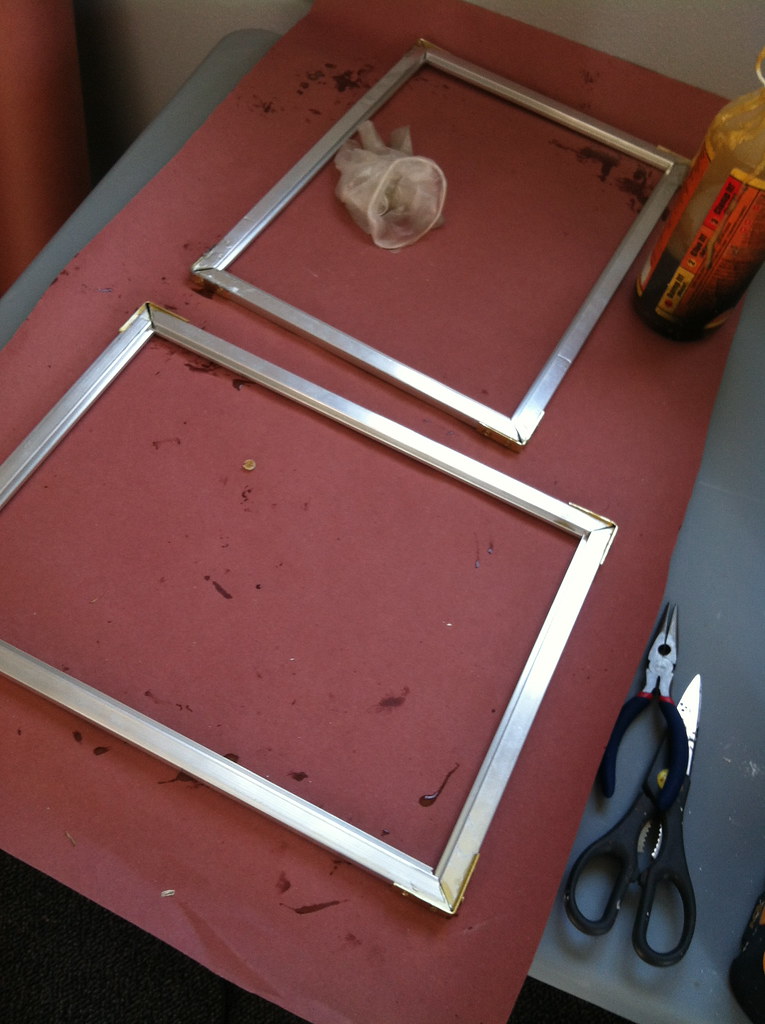
These are the frames that will hold the plastic. Aluminum window screen frame stock made into 12 x 16" frames with L brackets and Gorilla Glue for good measure. They'll get clamped on either side of the plastic sheet.

Like that.

If you've been watching the numbers, you'll have noticed that my frames are smaller than my table. I'm taping off the holes in the extra area of the table. I wanted to make it bigger than I needed for future projects.
Now, I won't say what my first project with the vacuum former is yet, but I will tell you that it's related to the new projection effect. Stay tuned, because in the next few days I'll put this thing to use.
Sunday, July 7, 2013
Small Haunted Tombstone Update (and More!)
The service that was previously providing the downloads for my Haunted Tombstone videos changed their format, and I didn't like how it looked, so I've switched over to a new service. It's still totally protected through PayPal, just a little cleaner and easier to use.
What? You haven't heard of my Haunted Tombstone? Well head on over and check it out!
Next up, I have an all new projection effect in the works for this season! Keep your eyes peeled, as I'll be revealing details soon.
What? You haven't heard of my Haunted Tombstone? Well head on over and check it out!
Next up, I have an all new projection effect in the works for this season! Keep your eyes peeled, as I'll be revealing details soon.
Monday, June 24, 2013
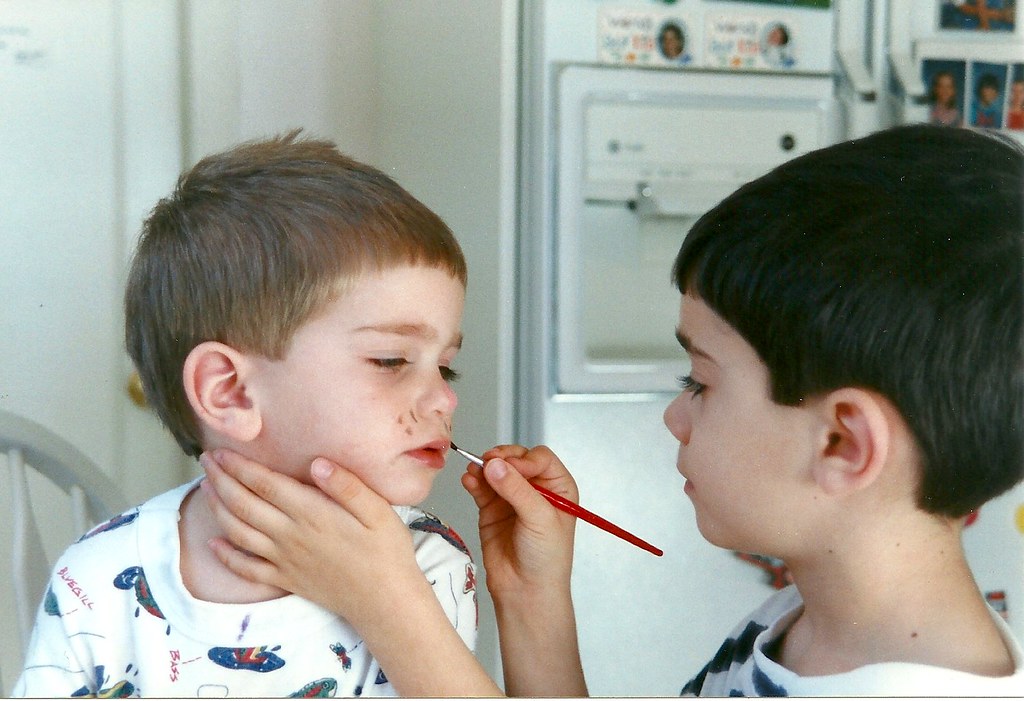
1997
It would seem that I've been at this longer than I thought.
 Looks like I roped my younger brother into being a some kind of animal, complete with hyper-realistic whiskers.
Saturday, May 25, 2013
Back to Basics
It's been a while since I sculpted anything like the characters I used to do for the haunt, so I'm going to try to make an effort to get back to that.
Here's the first of what I hope will be a series of little creatures. I'm calling him Flim (Fat Little Imp Man). Stay tuned for progress!

Here's the first of what I hope will be a series of little creatures. I'm calling him Flim (Fat Little Imp Man). Stay tuned for progress!
Saturday, May 18, 2013
Going Green...
This was a test application of a sort of subtle wicked witch makeup. Gelatin cheeks (to lift and enhance the cheekbones), brow, nose, and jaw/chin pieces (to lengthen her face). The next try will have real (not drawn on) eyebrows, cleaner edges (so it's harder to tell where the appliance stops and the real skin begins), and a better paint job (this was my first go at airbrush makeup).


A New Monster Movie!
If you're like me (and I assume you are if you're on here), you like monster movies. Fair assessment?
Cool. Now, I don't know about you, but I sure prefer a good, practical creature over some crazy computer generated monster. The thing about practical effects is that they just look real (because, you know, they're actually there on camera).
Well, my friends over at Amalgamated Dynamics (the creature effects shop that did some of the Alien sequels and a ton of other films you know) are embarking on their own project. They're going to write, direct, and do all of the all-practical creature effects on their own feature length film. It's called Harbinger Down. I can tell it's going to be pretty awesome.

Here's the link to the Kickstarter if you'd like to hear more or contribute: http://www.kickstarter.com/projects/1117671683/harbinger-down-a-practical-creature-fx-film
Seriously, check it out.
And, if you want to see some of the amazing work they've done on other films, check out their Youtube page: http://www.youtube.com/studioadi
Sunday, April 7, 2013
Five Minute Flashback

Saturday, March 23, 2013
'Tis Not the Season...
...but I figured it was time I took something off the to do list.


And I'm still not exactly happy with it, but I think it turned out much better.


This one comes with a bit of a story. Back in November, I was asked to make six Grinch makeups for a party of some sort, so I did a quick sculpt:

Did a test makeup with the help of the lead makeup artist for the party, who supplied the hair:

And then made up three actors for two days as Grinches:


It was all very, very rushed, and I was never pleased with any of it (though I did win a free airbrush as a result of the project...go figure!). I saved a couple of castings before the mold went south.
So, finally, this weekend, I went about applying the makeup on myself (since the appliance was sculpted over my lifecast in the first place), trying to get a more realistic look, or at least a little more like Rick Baker & Co.'s design for the movie.


Monday, March 11, 2013
Just A Little Trauma

The blood runs to the side because he would be laying down for the shot:

The wound is a little appliance that I sculpted on a flat board, molded in silicone, and cast in gelatin.


The design is based on a picture of a real head injury, but I'll spare you that image.

A little paint, a little blood...


Subscribe to:
Posts (Atom)