Wednesday, February 12, 2014
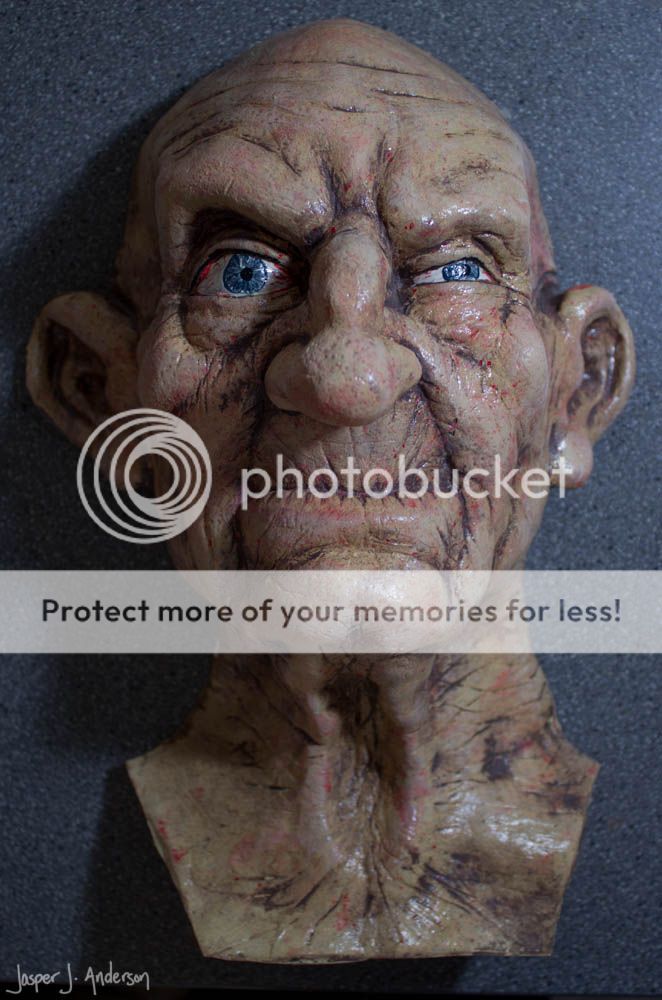
First Hag Mask Casting
I did a quick casting and painting of the Old Hag mask for use in the Beauty and the Beast production. Future copies will be painted a little differently, but it's fun to see her with some color. This one is only the front half, as that's all that will be needed with her costume.

It occurs to me the face could lend itself to all sorts of grumpy characters....

Sunday, February 9, 2014
Sculpting Tips (Fright Radio)
The new episode of Fright Radio comes out today, so below you'll find the transcript for my segment on sculpting tips. This one centers around the primary clay options for haunters. As with last time, I've tried to give a few links where I can.
Thoughts on Sculpting for a Haunt
Good evening. I'm Mr. Chicken, and you're entering my Hall of Illusions.
I was listening to the last two episodes while sculpting an old hag mask, and trying to figure out what to do another segment on for my return to the show, when suddenly I realized I was staring it in the face, quite literally. So pick up your sculpting tools and let’s talk about sculpture for haunting.
There’s a lot of information online about sculpture, so I want to focus on some ideas that you won’t hear as much. Specifically, these are the sculpting tips I wish someone had told me when I started out.
Sunday, January 26, 2014
Molding the Old Hag Mask
A Moldmaking Tutorial for Latex Masks
This isn't the only way to mold a sculpture for mask making, but it's what I did for the Old Hag posted earlier this month (sculpted in WED clay), and it works pretty well.
First a light, even coat of crystal clear (Krylon is the appropriate brand to use, but I had Rustoleum on hand and it worked fine). This is to seal off the water content of the clay so it doesn't interfere with the plaster later. Ooo, shiny! Make sure to give it plenty of time to dry before proceeding.

Back inside. I decided to mold this one laying down, so I propped the sculpture face up on a piece of bubble wrap (to protect the back and keep it from rolling), then put some bricks and blocks of wood to fill in most of the space before I build the clay wall.

I used EM-210 White Clay (which is a fairly dark grey, for whatever reason) to build the mold wall.

This isn't the only way to mold a sculpture for mask making, but it's what I did for the Old Hag posted earlier this month (sculpted in WED clay), and it works pretty well.
First a light, even coat of crystal clear (Krylon is the appropriate brand to use, but I had Rustoleum on hand and it worked fine). This is to seal off the water content of the clay so it doesn't interfere with the plaster later. Ooo, shiny! Make sure to give it plenty of time to dry before proceeding.

Back inside. I decided to mold this one laying down, so I propped the sculpture face up on a piece of bubble wrap (to protect the back and keep it from rolling), then put some bricks and blocks of wood to fill in most of the space before I build the clay wall.
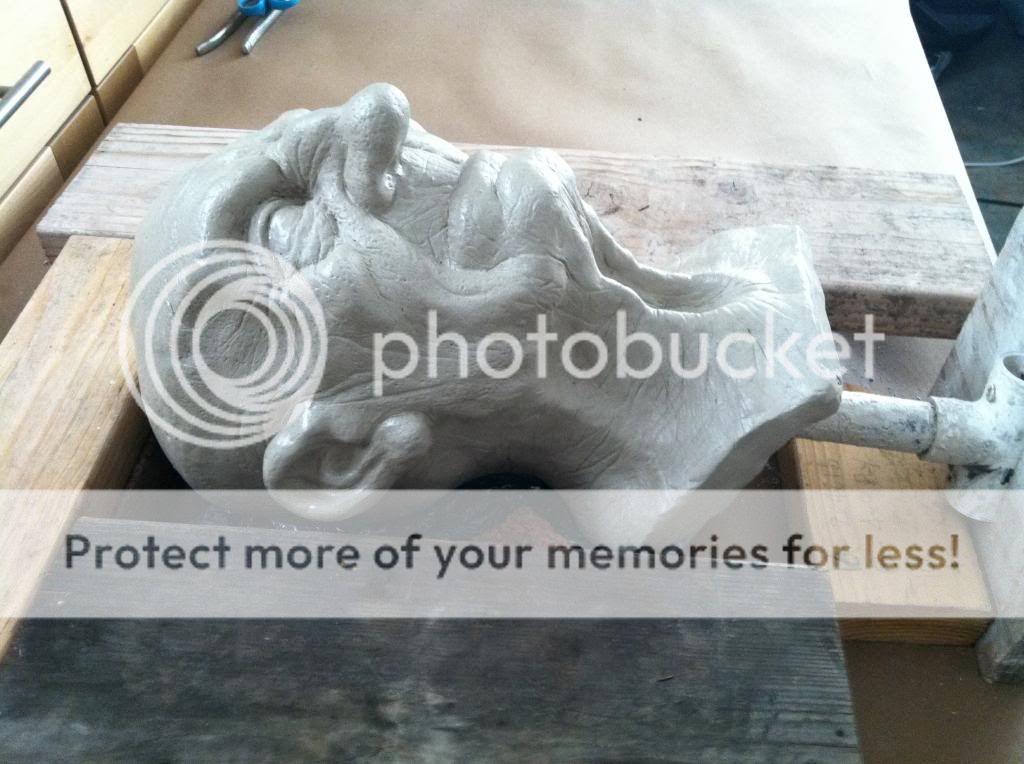
I used EM-210 White Clay (which is a fairly dark grey, for whatever reason) to build the mold wall.

Wednesday, January 8, 2014
Projection Effect Tips
This is the transcript from my segment on the first episode of Fright Radio, a new podcast for haunters.
Warning: it's lengthy, so you may prefer to listen. I did add in a couple of links here, though, in case you want to reference something I mentioned.
Warning: it's lengthy, so you may prefer to listen. I did add in a couple of links here, though, in case you want to reference something I mentioned.
Good Evening. I’m Mr. Chicken, and
you’re entering my Hall of Illusions. Since this is your first
visit, I’m going to start by sharing some tips and tricks to
getting the most out of projection effects.
I’m going to talk about choosing a
projector, hiding the secret of your effect, video playback options,
alignment of projection effects, and a few other tricks I’ve picked
up in my experiements.
I’ve been making my own projection
effects since 2007, when I animated Davy Jones from Pirates of the
Caribbean appearing on the sail of my pirate ship. The next two
years I made and updated a recreation of Madame Leota from the
Haunted Mansion at Disneyland. You may have read my how-to. In
2012, I developed my Haunted Tombstone projection effects, and just
last month, I released Sybil the Clairvoyant, an update, and, dare I
say improvement upon my old Madame Leota.
Projection effects are a great thing
for home and professional haunters alike. Not all videos and setups
are cheap, but they’re high impact, have a low storage footprint,
and are very easy to set up.
Subscribe to:
Posts (Atom)