New video on using my Beast masks and applying makeup to go with them for Beauty and the Beast productions.
Plus, new, easy ordering on the new website: http://www.chickenprops.com/p/beast-mask.html
Showing posts with label Beauty and the Beast. Show all posts
Showing posts with label Beauty and the Beast. Show all posts
Friday, June 20, 2014
Sunday, March 2, 2014
Beast Mask
**These masks are available for purchase here**

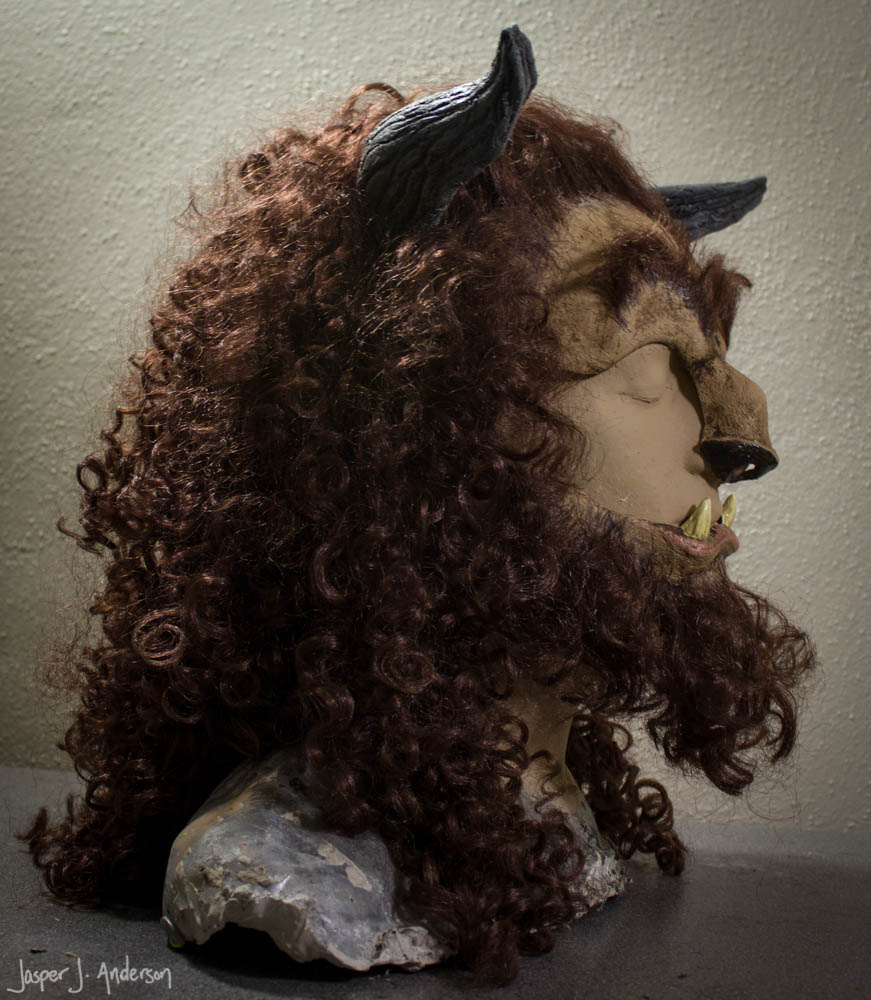
So, let's talk origins. This design is a combination of, primarily, three or four different ideas. The first, of course, is the Glen Keane (and team) design for the Beast in Disney's animated film.

Then comes John Dods' design for the prosthetic makeup for the Beast (and all other characters) in the Broadway production. This is a test makeup Dods did before the production was seen by the public.

It's a series of foam latex prosthetics (with plenty of hair) designed to bring the actor's face into the proportions of the animated design.


So, how to do that for a high school... Well, the thing about prosthetics is you need a new set each night, which can really drive up the cost, and they take time and experience to apply and remove. My Beast actor is a high school student, so I didn't want to subject him to an hour plus makeup job, the show's budget isn't huge, and I wouldn't be there to do the makeup each night, so I needed another way to get the feeling of John Dods' iconic look. If you just make a latex mask over his face, he can't perform. The solution began with another Broadway musical: Wicked.
Makeup designer Matthew Mungle devised a clever rubber mask for Wicked's animal characters, where just the upper portion of the face is covered. The one on the left was the one that made it click. Just a brow and nose, and the rest of the face is free to act.
But everyone wanted the Beast's tusks, so I turned to a design I had worked with myself. Ralis Kahn, another makeup effects artist, came out with a line of Mad Monster Masks last year that featured a moveable jaw, hinged with elastic. I helped paint them, and got to know the design pretty well, so I knew it would be a great way to get the Beast's tusks on there. Here's one of Ralis' masks. See split where the jaw is a separate piece under the main portion of the face? Pretty cool.

So, merging all of that together (plus two sizeable synthetic wigs), I ended up with my own Beast mask design. It's a little bit of my spin on everything else that's come before, and was pretty fun to do.
Update: here's a new video of the mask in action 6/23/2014
**These masks are available for purchase here**
Testimonial:
"What a BEAUTIFUL job you did on the Beast Mask. Ballet North is THRILLED with your work, and YES, he CAN dance in it. What I particularly like is that you can also see his face, so facial expressions can be seen, instead of being hidden behind a frozen face. So, thank you, thank you."
Wednesday, February 12, 2014
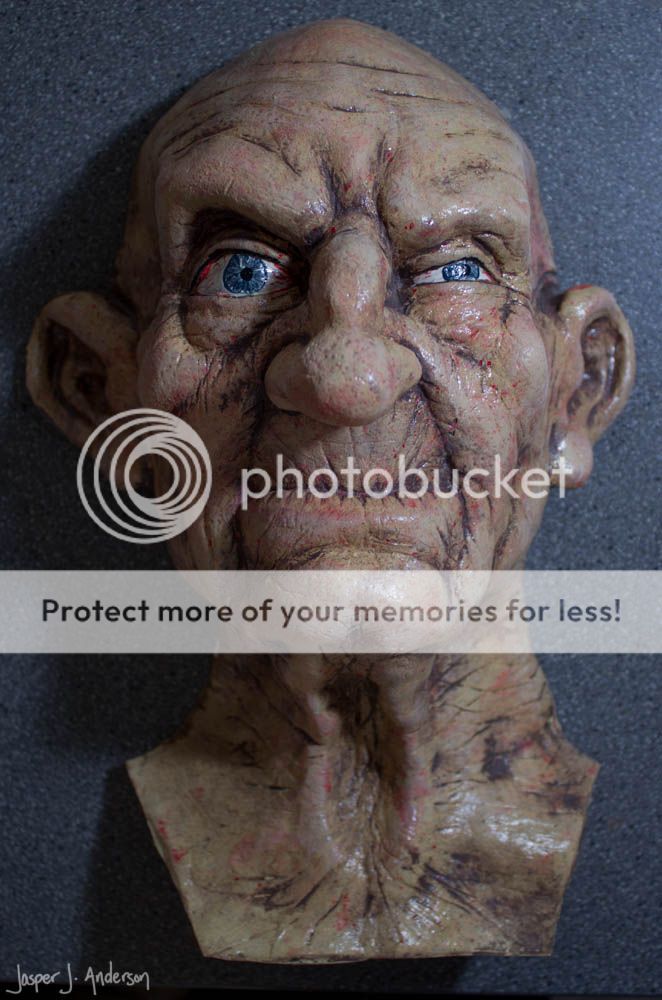
First Hag Mask Casting
I did a quick casting and painting of the Old Hag mask for use in the Beauty and the Beast production. Future copies will be painted a little differently, but it's fun to see her with some color. This one is only the front half, as that's all that will be needed with her costume.

It occurs to me the face could lend itself to all sorts of grumpy characters....
Sunday, January 26, 2014
Molding the Old Hag Mask
A Moldmaking Tutorial for Latex Masks
This isn't the only way to mold a sculpture for mask making, but it's what I did for the Old Hag posted earlier this month (sculpted in WED clay), and it works pretty well.
First a light, even coat of crystal clear (Krylon is the appropriate brand to use, but I had Rustoleum on hand and it worked fine). This is to seal off the water content of the clay so it doesn't interfere with the plaster later. Ooo, shiny! Make sure to give it plenty of time to dry before proceeding.

Back inside. I decided to mold this one laying down, so I propped the sculpture face up on a piece of bubble wrap (to protect the back and keep it from rolling), then put some bricks and blocks of wood to fill in most of the space before I build the clay wall.

I used EM-210 White Clay (which is a fairly dark grey, for whatever reason) to build the mold wall.

This isn't the only way to mold a sculpture for mask making, but it's what I did for the Old Hag posted earlier this month (sculpted in WED clay), and it works pretty well.
First a light, even coat of crystal clear (Krylon is the appropriate brand to use, but I had Rustoleum on hand and it worked fine). This is to seal off the water content of the clay so it doesn't interfere with the plaster later. Ooo, shiny! Make sure to give it plenty of time to dry before proceeding.

Back inside. I decided to mold this one laying down, so I propped the sculpture face up on a piece of bubble wrap (to protect the back and keep it from rolling), then put some bricks and blocks of wood to fill in most of the space before I build the clay wall.
I used EM-210 White Clay (which is a fairly dark grey, for whatever reason) to build the mold wall.

Tuesday, January 7, 2014
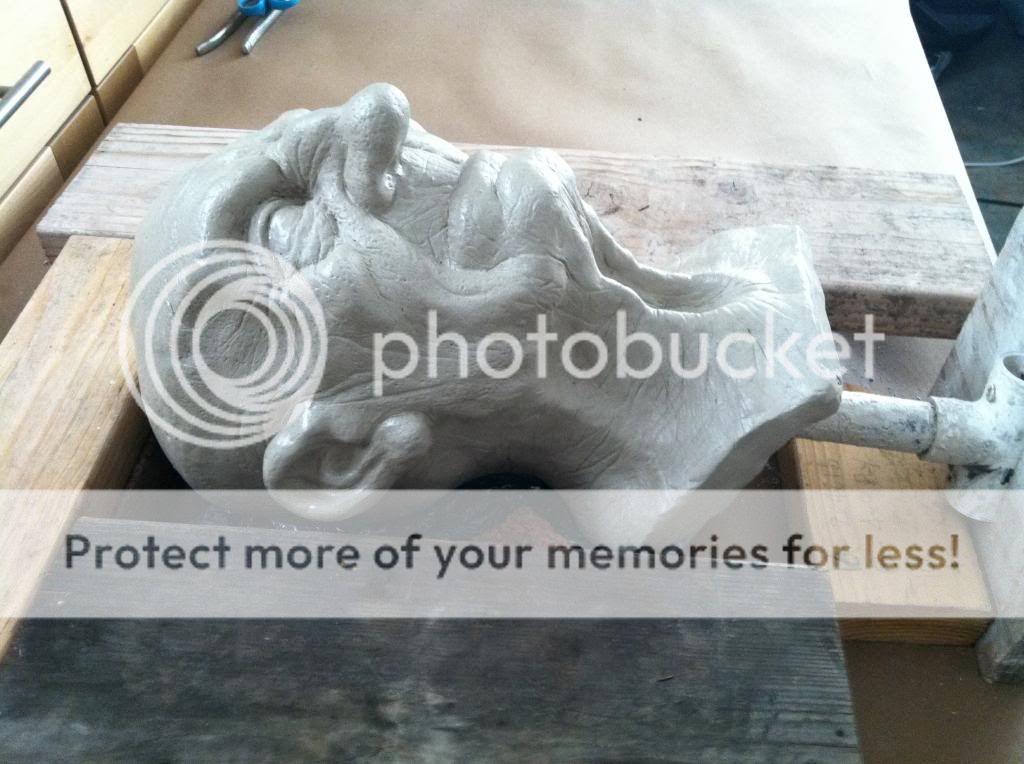
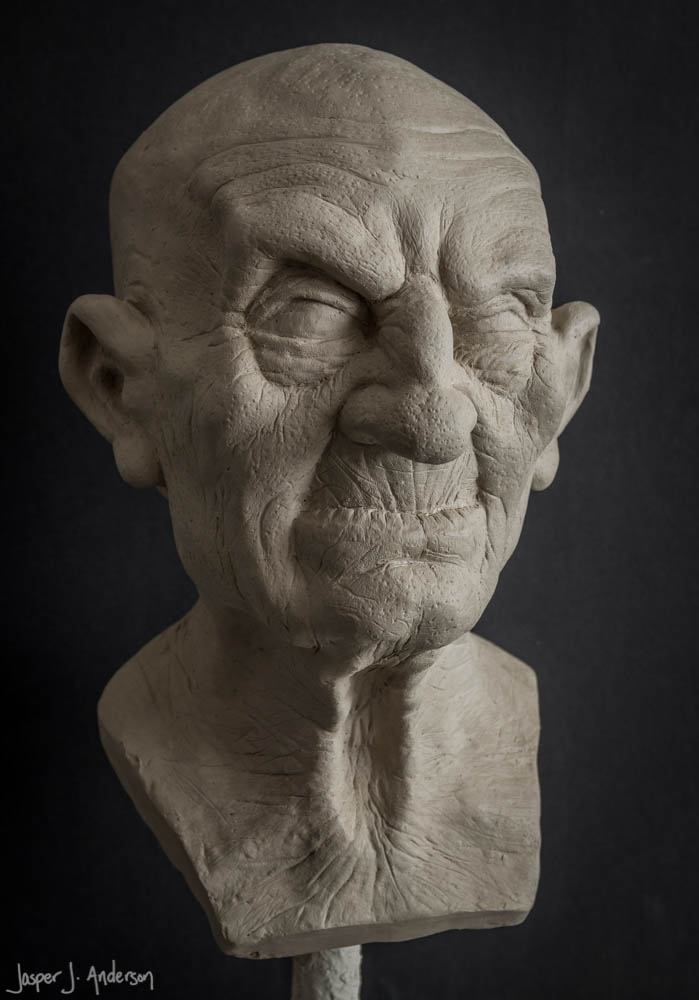
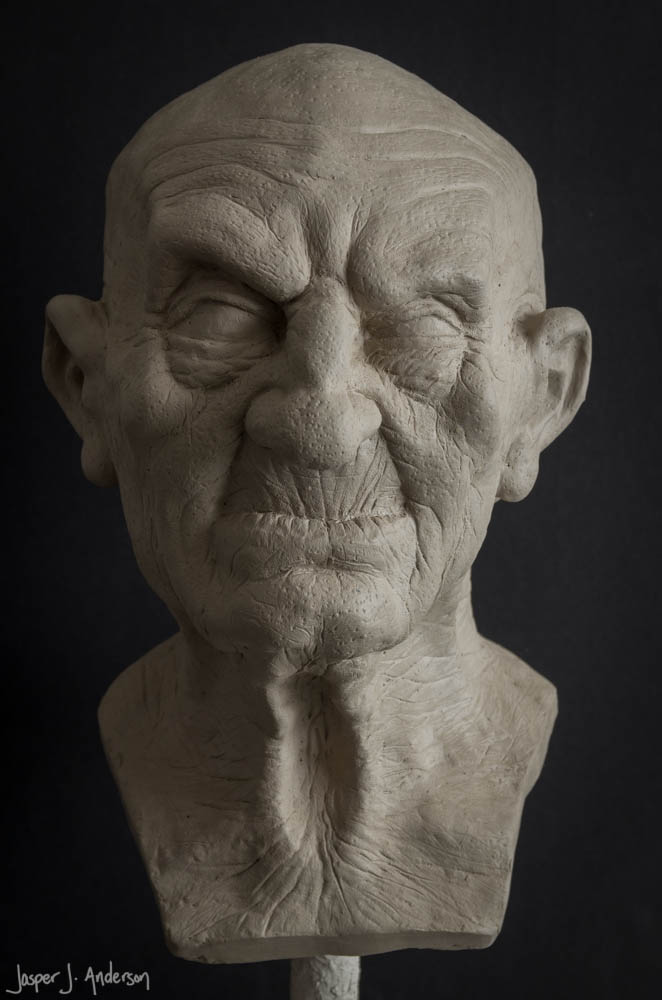
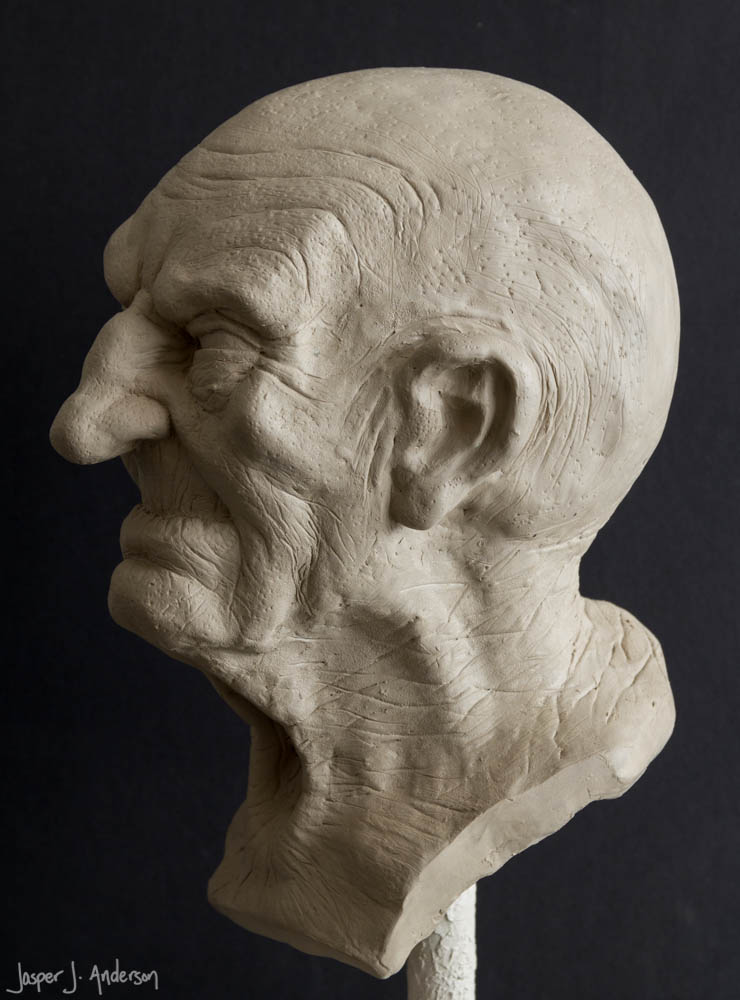
Old Hag Mask Sculpture
I decided to call the sculpture done today. I'll mold it in Ultracal tomorrow.

Thursday, January 2, 2014
An Old Hag
I've been asked to do a few pieces for a production of Beauty and the Beast, so the next few posts here will be my progress on that.

First up is a mask of the old beggar woman who turns into the enchantress who turns the prince into the Beast in the beginning of the show. It's very much a work in progress, but I'm excited to post it here because it feels like a return to the sort of characters I used to sculpt for the haunt.
And yes, she'll make a good witch prop, too. More to come.
Subscribe to:
Posts (Atom)