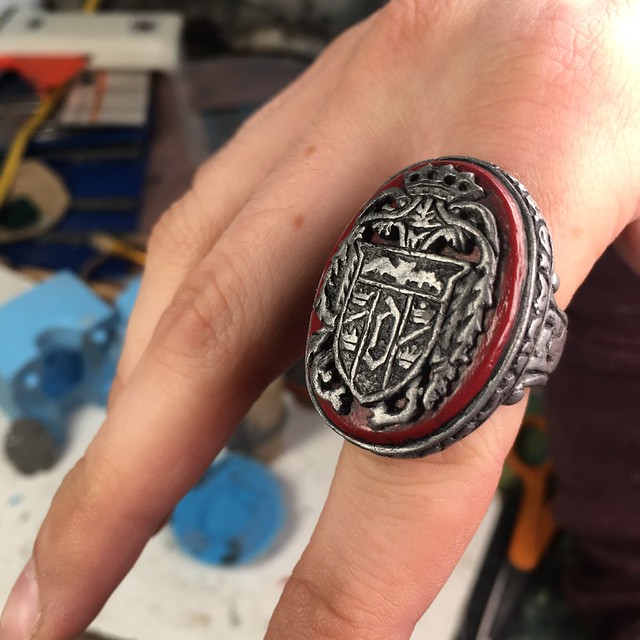
I decided to start with the Dracula crest ring. There have been a few replicas produced over the years, and they all look nice at a glance, but once I saw the auction photos of the original ring, which belonged to Forry Ackerman for many years, it became clear that most of the current replicas are very sterilized, geometric interpretations of what would have been an organic, hand sculpted design, presumably by a jeweler in the '40s. Yes, the 1940s. In the original Dracula film in 1931, Lugosi wore a plainer ring. This more extravagant Dracula crest ring was first seen in the John Carradine sequels (though was probably altered from the Lon Chaney Jr. Dracula/Alucard ring), and finally worn by Lugosi in Abbott and Costello Meet Frankenstein.
There have also been replicas molded from the original ring, but they seemed to suffer from lost detail. You'll see the original in the printouts I'm working with for my rendition.
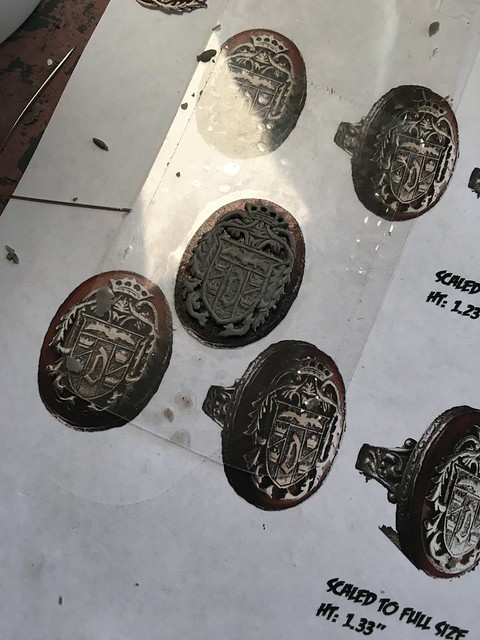
Anyway, detailed though it is, I thought I would be able to sculpt the ring in Apoxie Sculpt, and if I mixed in aluminum powder, it would be able to be buffed to a metallic shine. I did several tests with several methods, but didn't come up with something that would be workable at the fine level of detail I would need. So I decided to use Super Sculpey Firm, because it is hard enough to hold the sharp detail, and could be sanded after baking if needed. I jumped right in to the crest. I scaled the auction photos to full size, and cut out templates to help keep my proportions correct. I also traced the image onto a piece of clear plastic, so I could hold it over the sculpture to check. I ended up using various sizes of needles as my loop tools! Once that was baked and cleaned up a bit, I dumped some silicone on it. I cold cast it the way that's worked best for me in the past, which is to coat the surface with metal powder, and fill with black resin. Buff with steel wool, a very slight black wash, and the crest is done.
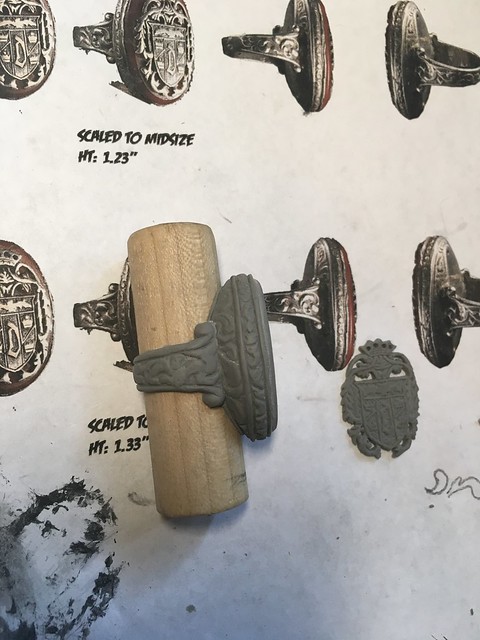
I had to think quite a bit about how I would mold the main ring part before proceeding. The thing about cold casting is it's very difficult to repair any imperfections in the seam or otherwise, because you need to preserve that ultra thin surface layer of metal. Once I figured out that I could have a removable dowel in the center, and split the mold where the band joins the main hunk of material, I could start sculpting. I decided that I would not attempt to mount a separate stone of any sort in the center. The tolerances would have to be so precise that it wasn't going to be worth it. Instead, I'd just sculpt it right in, and paint it later. The center of the stone would actually be the perfect place for a pour spout, since the crest would cover it up.
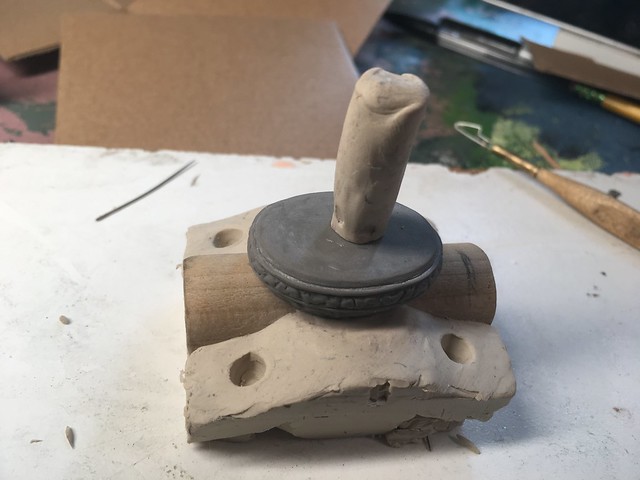
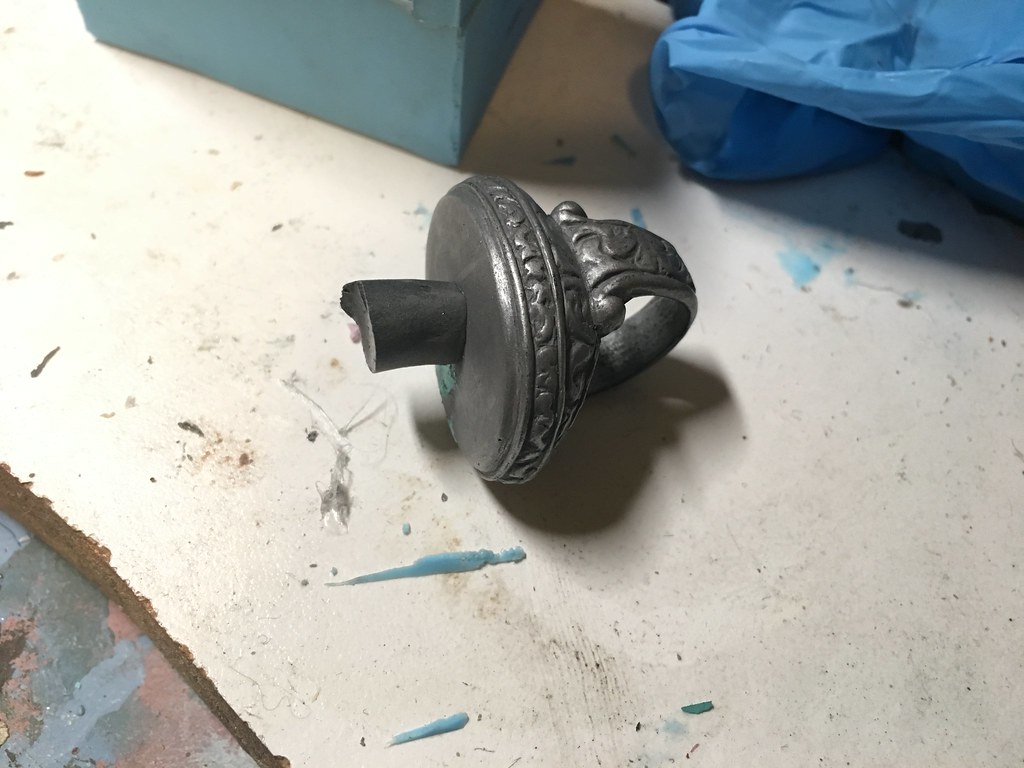

Sculpt, mold, cast the same way. I released the dowel with vaseline, and coated it in aluminum powder. It didn't quite take to the resin like the metal on the silicone sections did, but it's on the inside, so it doesn't matter much. With the stone painted, and a black wash over the recesses, I could carefully superglue the crest on top. And that's not too shabby for a plastic recreation. It's not perfect. I think I'd need some smaller needles to really get a 100% match on the sculpture, but I think it captures the feeling of the original. I gained a lot of respect for old school wax jewelry sculptors, too.
More to come!

More to come!
Cool post.love it!
ReplyDeleteWhat do animals eat?
Did you ever finish with ring?
ReplyDelete