Sunday, October 30, 2016

I Have A Bad Feeling About This...

You know when you have a great idea for Halloween costumes but only a month to pull it off?

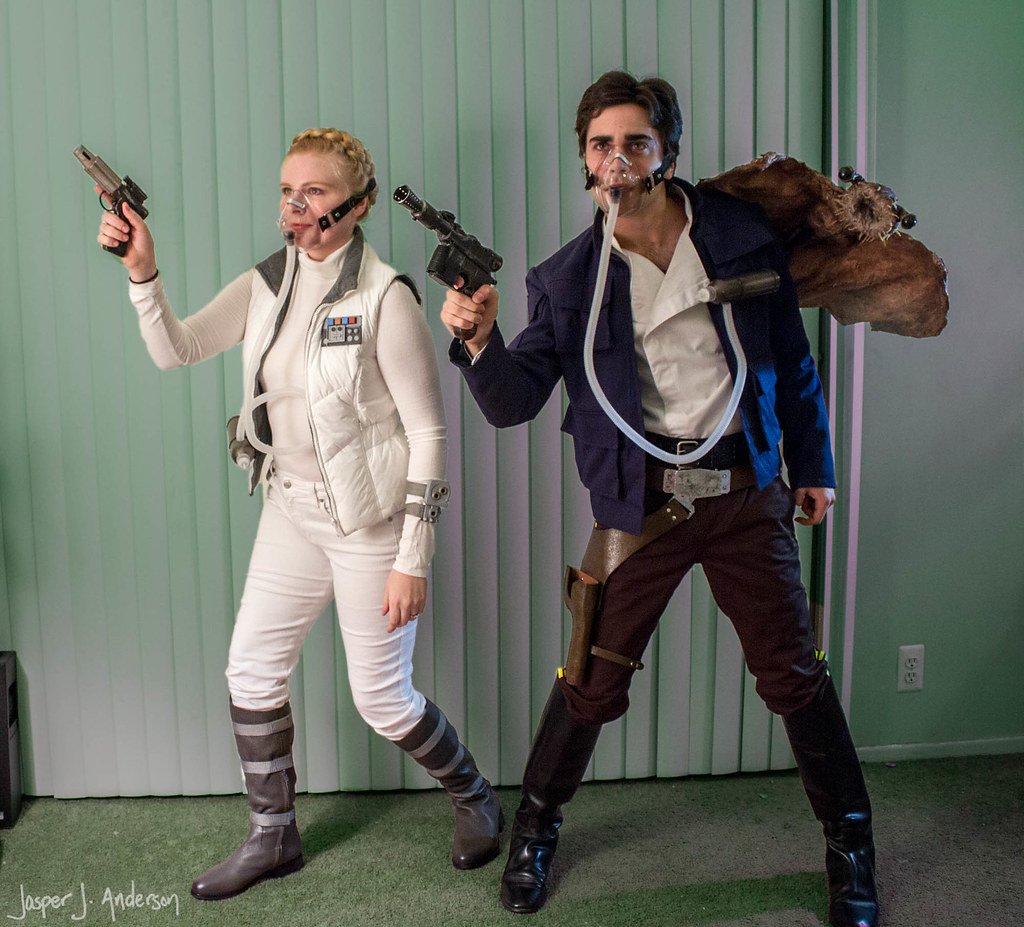
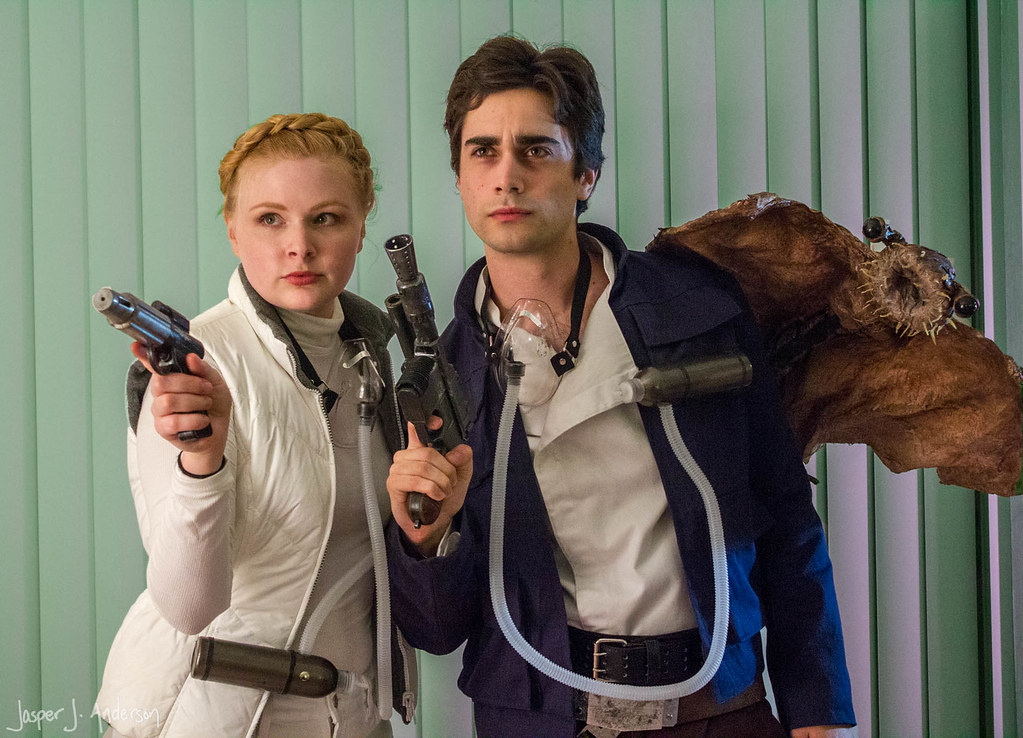
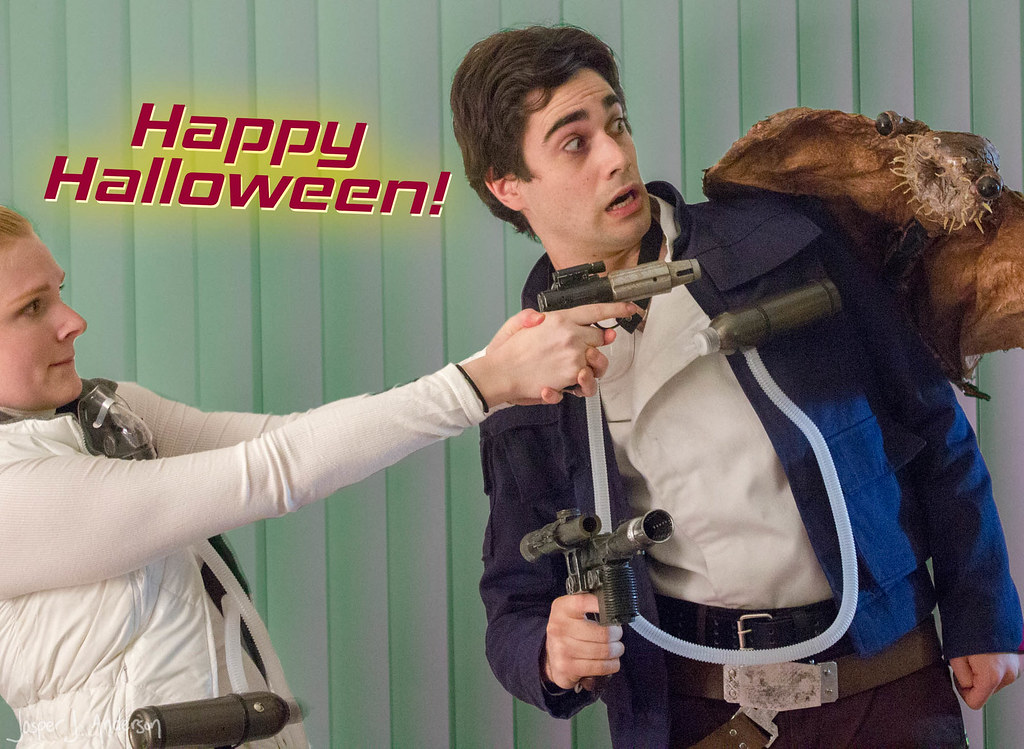
I'll just cut to the end, just before we left for a Halloween party:


We couldn't just do Star Wars costumes.  No, no.  It had to be ridiculously specific Star Wars costumes.  Here's the scene in question:


Given the timeline, we had to make some quick decisions on how we would achieve these.  Turns out everything we thought would be easy ended up being a lot of work!

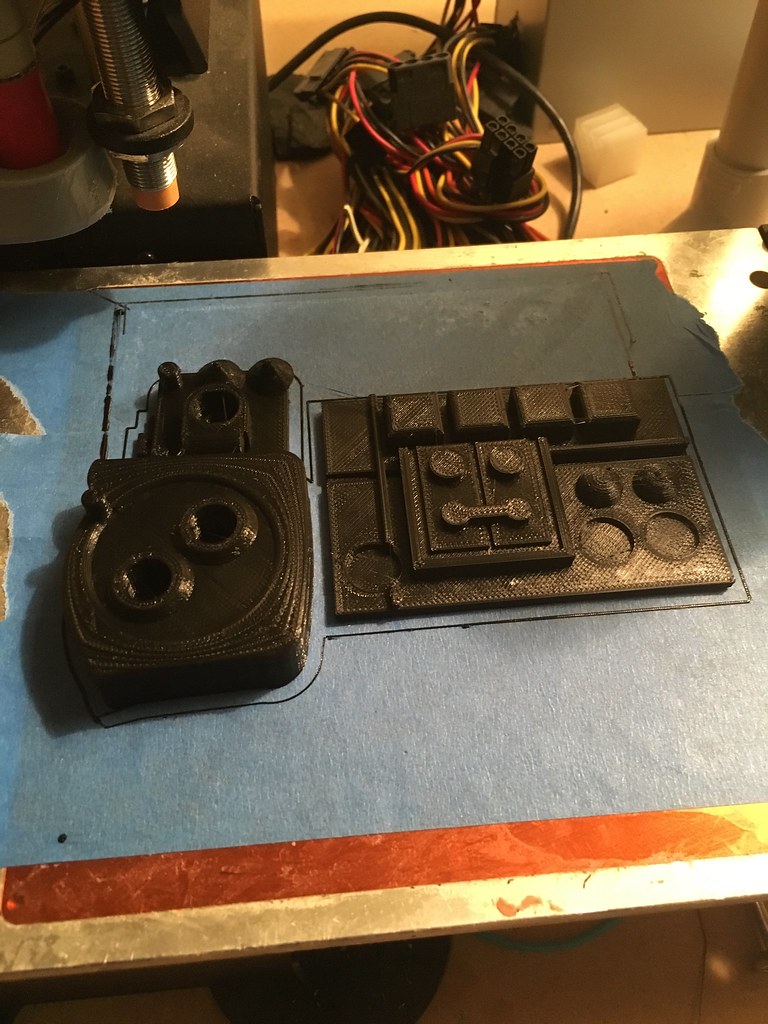
This was easy, though!  This generous geek uploaded the files for Leia's badge and arm thingie to Thingiverse, so it was download, print, and paint!

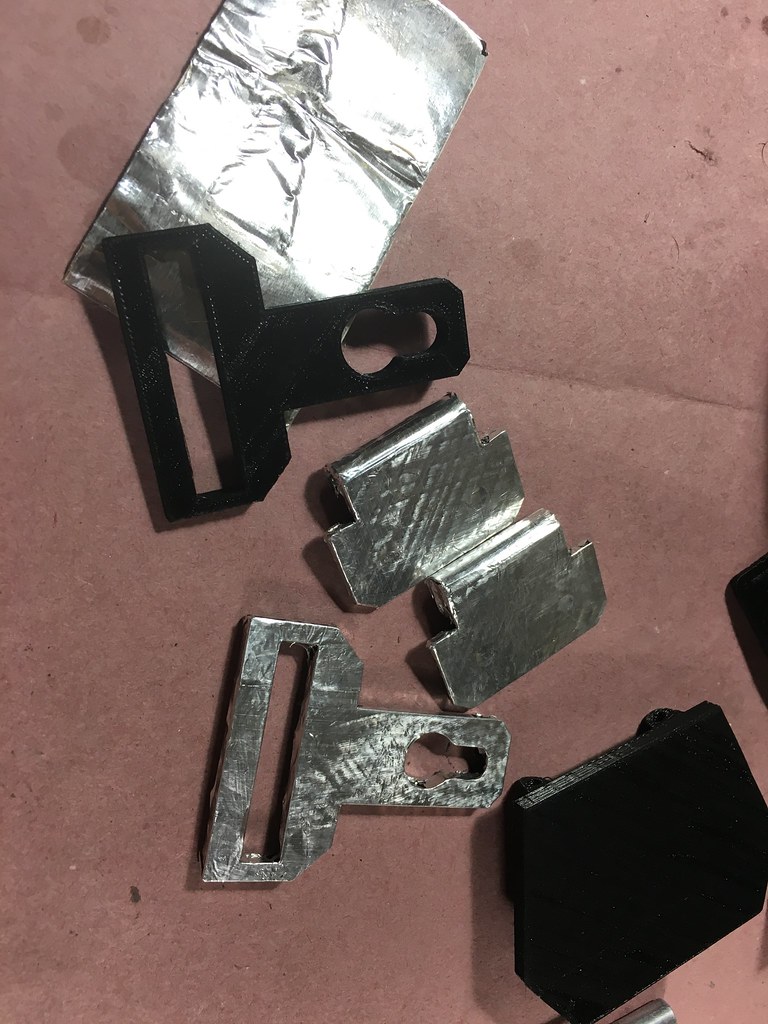
Same thing for Han's holster belt.  Being in speed mode, I didn't clean up any of the prints. I just wrapped them in aluminum tape.

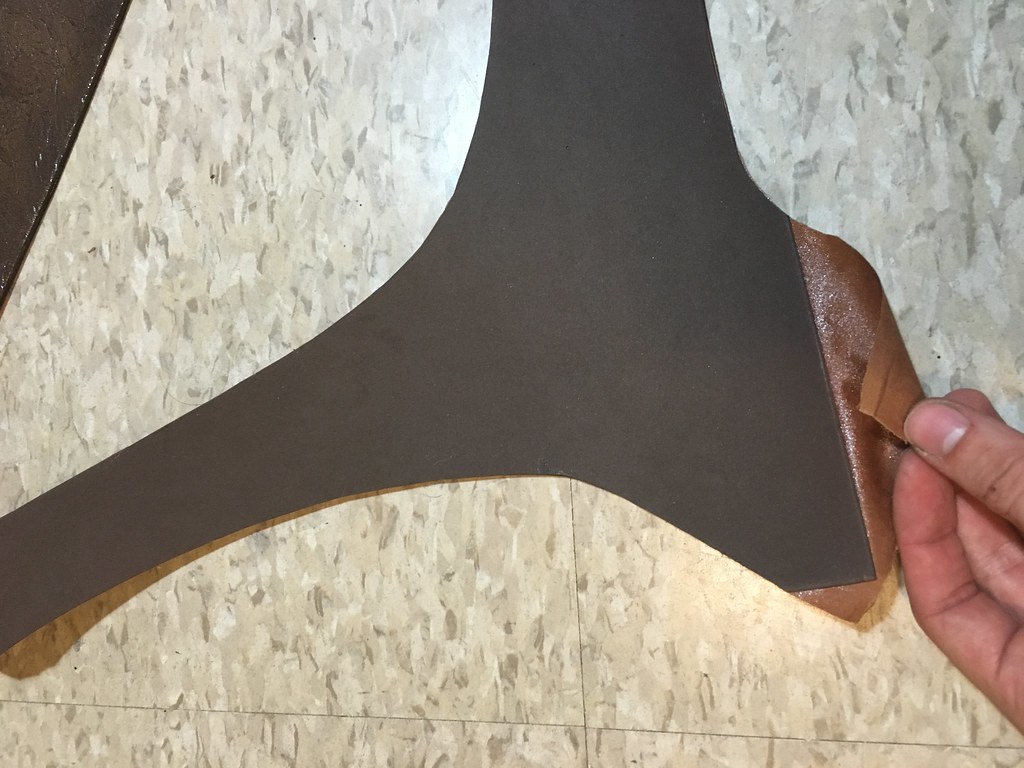
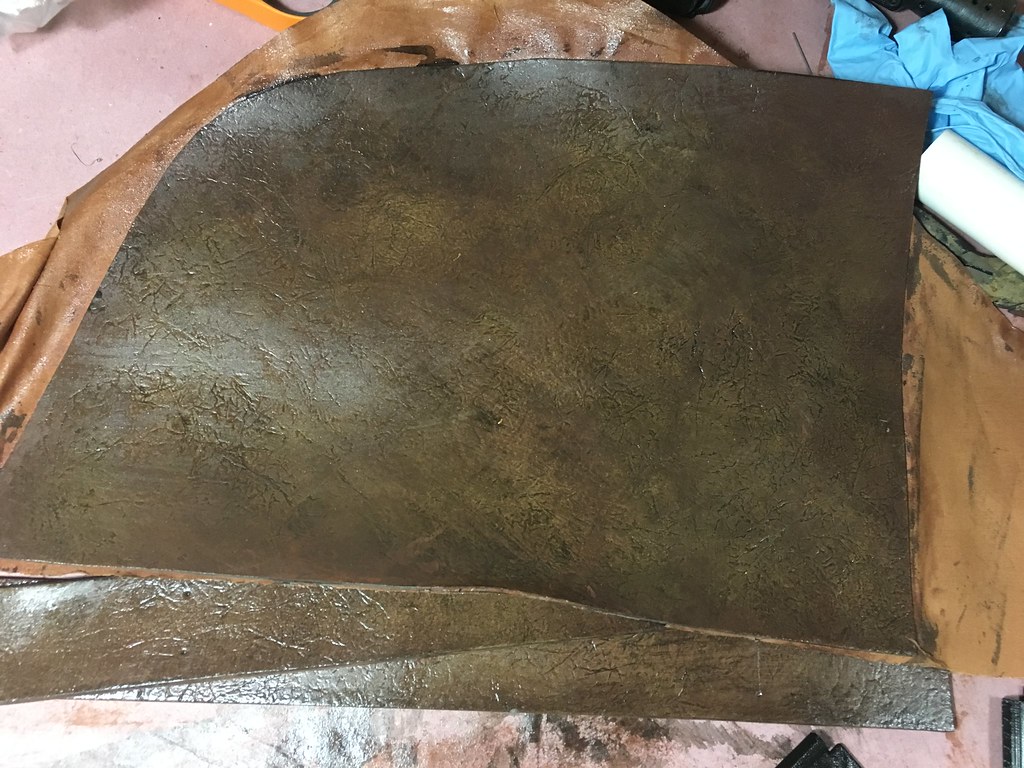
For the belt itself, I didn't want to spend the time or money to work with real leather, so I glued fabric on the back of craft foam for strength, textured it with aluminum foil and a heat gun, and painted it kinda leathery.  The parts were mostly held together with regular old office brads!

The oxygen masks were kind of fun, but it was surprisingly difficult to source those dang clear corrugated tubes!  After days of searching hardware stores and online, we ended up finding disposable hookah pipes were the closest match.  It's a little thin, but hey.  The masks themselves were actual oxygen masks that we replaced the straps on (with brads again!).  I had to 3D print a connection piece to step down to the right diameter.  The oxygen canisters are dollar store hairspray bottles with zip ties and a binder clip on the back.

Leia's clothes we were able to source from existing pieces and a trip to the mall for a "close enough" look.  

But oh, Han's jacket.  I looked high and low, but I couldn't find a close enough jacket that existed for the right price that wasn't a Made in China Halloween piece.  So I bought a pattern from Dawn Schons (Dawn Anderson) and sewed it.  I haven't sewn anything more than some velcro tabs since the robe my witch prop wore ten years ago, so it was a bit of a challenge.  I made it happen in a week of evenings, though, and it didn't turn out half bad for its purpose.

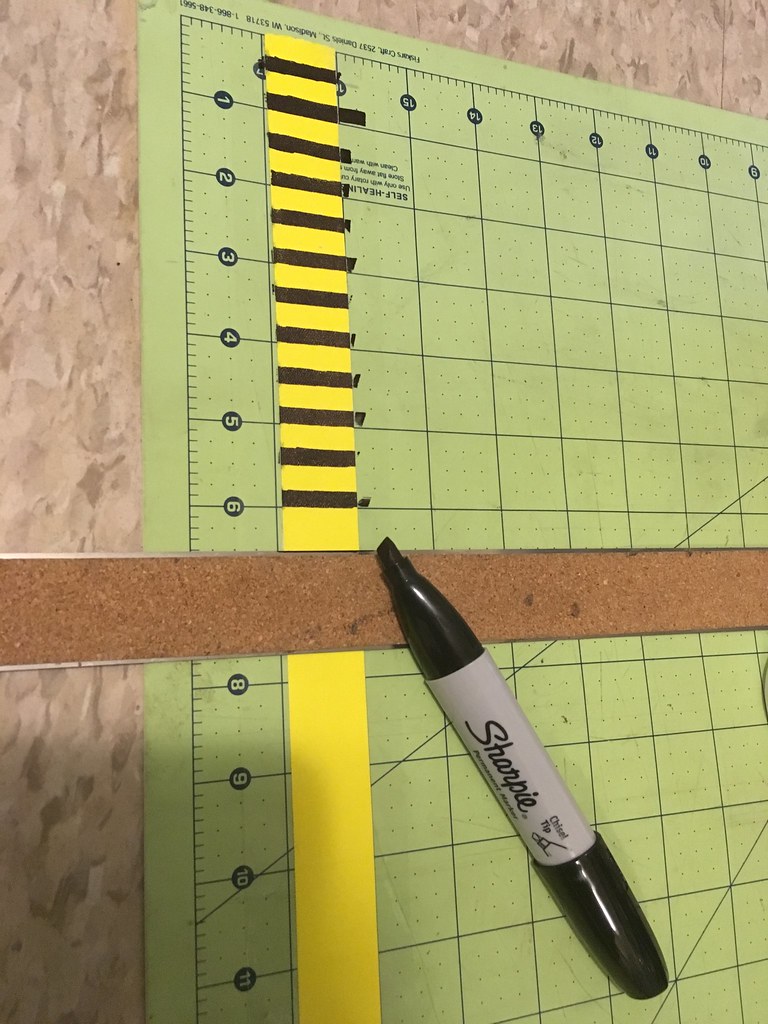
You wouldn't believe how hard it was to find brown pants, either.  I got some good ones that I'd like to wear in real life, so I didn't want to do the yellow stripes permanently.  The solution?  Yellow gaff tape and a sharpie.  Yup.
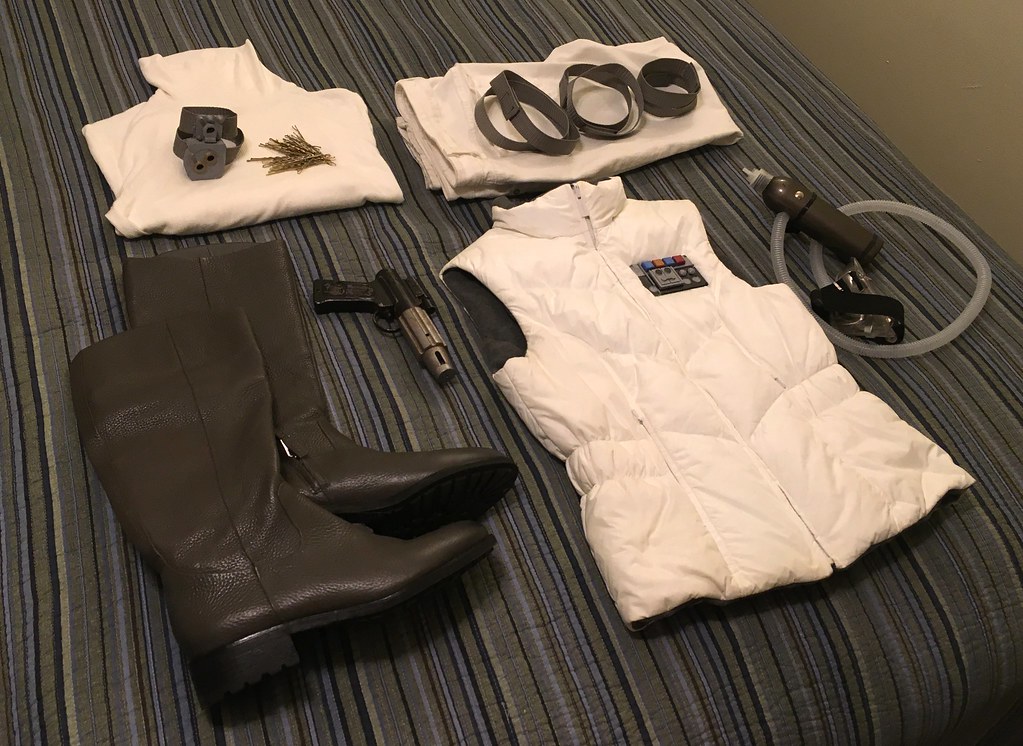
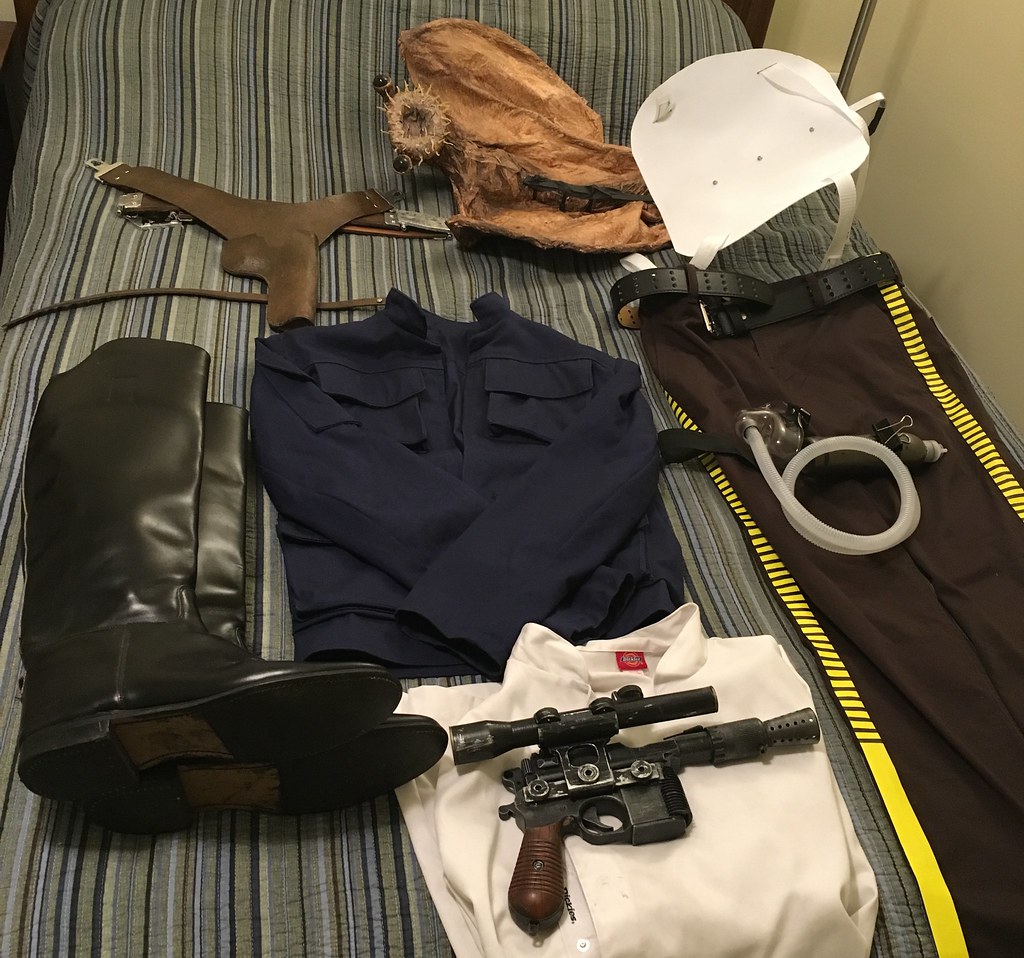
The whole Han kit:

The white shirt was a lightly modified chef's jacket.  I definitely bought those boots for last year's costume with the intention of doing Han at some point.

Oh yeah, what about that mynock bat creature?  Here's a full walkthrough of that build.  He's attached to an aluminum bar on a plastic plate that's strapped to my back under the shirt (seen above).  It's about as comfortable as it sounds, but it holds him in place with just enough floating action from the flex of the bar.
Monday, July 11, 2016

The Stuff that Dreams are Made of

I like old movies.  The Golden Era of Hollywood is what got me into the film industry.  Frankenstein, The Wizard of Oz, Rear Window, Double Indemnity, The Maltese Falcon.


Here is a film that circles a single object.  It's pure Macguffin, in that it would make little difference to the plot if it were a golden walnut, but there is a simple beauty to the falcon itself, and the fact that the mere image of the bird evokes the spirit of the film makes it a powerful artifact today, regardless of...well, you'll know where I'm going if you've seen it.

I got my hands on a plaster casting that claims to be sourced from the prop in the movie.  There are hundreds of these floating around.  Some people take it as canon, others immediately trash it for its inaccuracies. You can see how bizarrely different, yet proportionally similar this bird is from the real one.


After studying it closely, I'm quite certain that this is, in fact, derived from the same mold as the Falcon on the silver screen, at one point in time.  The indented feathers of the Falcon on the screen matches up perfectly to the spaces between the raised feathers on the plaster bird.  For one reason or another, the bird was sculpted (by artist Fred Sexton) with raised feathers, then sanded down to produce a more streamlined sculpture.  But because the original mold had the raised feathers in it, that's the version that got around (and even made it into the 1975 comedy "The Black Bird").  The other bummer about this casting is that his head is squished, but I can fix that, too.

Now, other people have gotten this far and created beautiful original sculptures.  Michael Key of Makeup Artist Magazine, Ozymandius from the Replica Prop Forum, and, most famously, Adam Savage, the Mythbuster.  I highly recommend his 15 minute TED talk on the subject.  Incidentally, I saw him give this talk at the San Mateo, CA Maker Faire in 2008, which no doubt planted the seed in my head.

I resolved to make this a sculptural restoration project, much like my Hatbox Ghost last year.

Shall we begin?

I molded the plaster bird to do a clay pour in Monster Clay, then proceeded to match it up to the screenshots from the movie.


I shaved and smoothed the feathers, fixed the scoring on the wing feathers, which had been over exaggerated, and reshaped much of the head.  This shot is mid-progress.


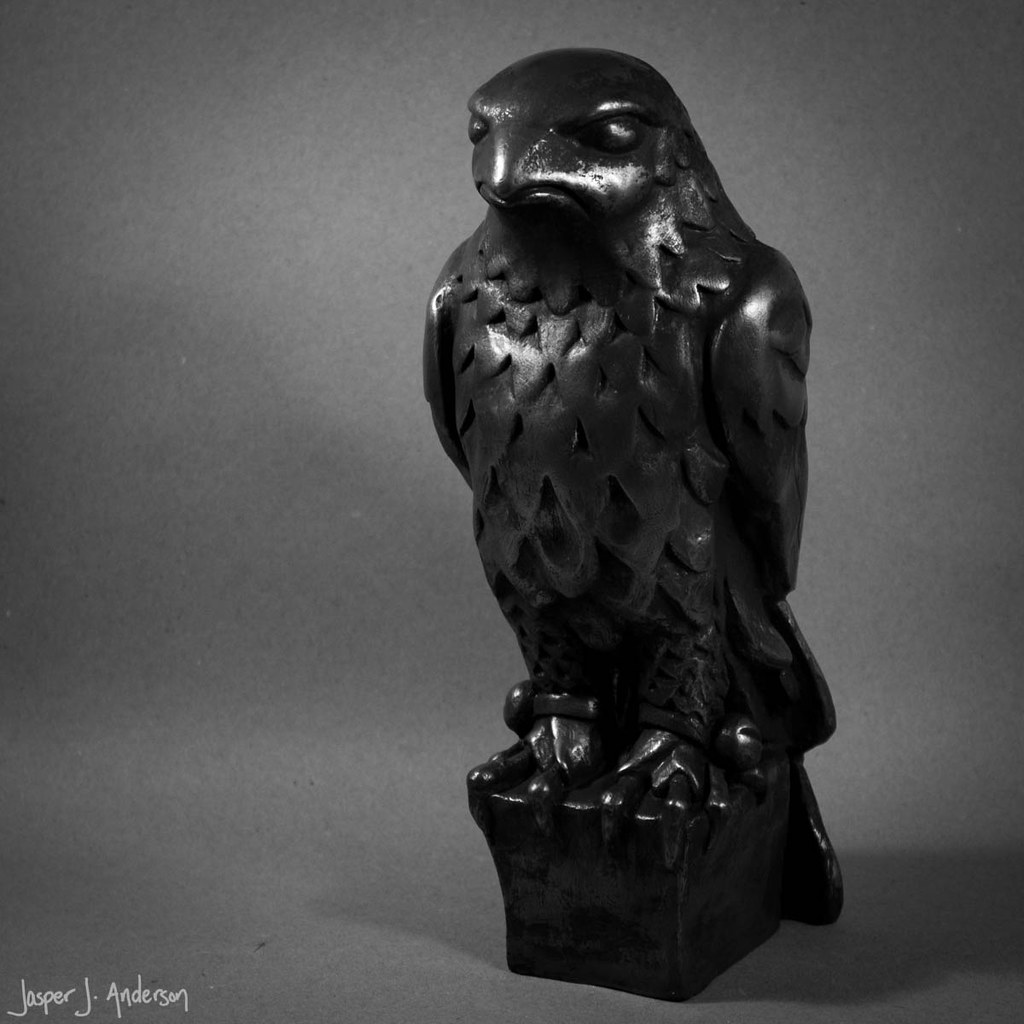
When I had taken the sculpture as far as I cared to (I felt a certain amount of roughness was okay, given how the real prop was bumped and scratched, and allegedly dropped on Bogart's foot), I molded it, and cast it in Smooth On's Onyx resin (the fast setting version).


And that was kind of anticlimactic.  I don't know, maybe it was because the gloss coat I put on the sculpture before molding made it look wet instead of naturally shiny. Maybe it was too shiny.  Maybe it's that the resin is ever so slightly translucent, so it doesn't look like a solid surface.  But the big problem I had is that you could no longer see the detail, so it didn't look like the Falcon in the movie.

But I had another idea.

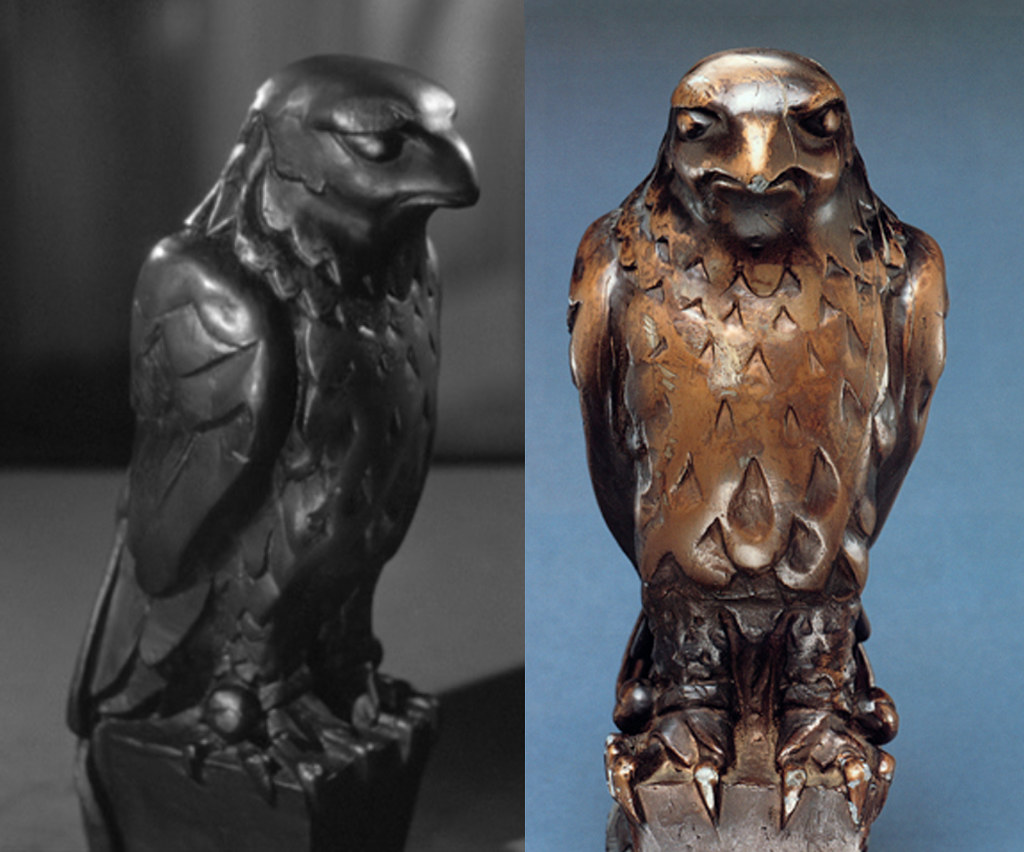
The original lead Maltese Falcon went up for auction about 20 years ago.  The first thing that struck me about the promotional images (after the color) is that you can tell it's the bird seen in this shot in the movie because the eyebrow is dented in the same way.  I assumed that somehow the gold color had been exposed over the years since shooting.  But, as I looked closer at the tonal variations in the screenshot, I saw that the lighter areas corresponded to the gold areas on the auction bird, specifically around the neck.  I became reasonably confident that this gold/brown coloration was more or less how the bird appeared on set.


It makes sense, too.  Even though the script specifies a "black bird," the art department wouldn't make a jet black prop.  It wouldn't show up well on camera.  Funny, because it's the same problem I had with my black bird.

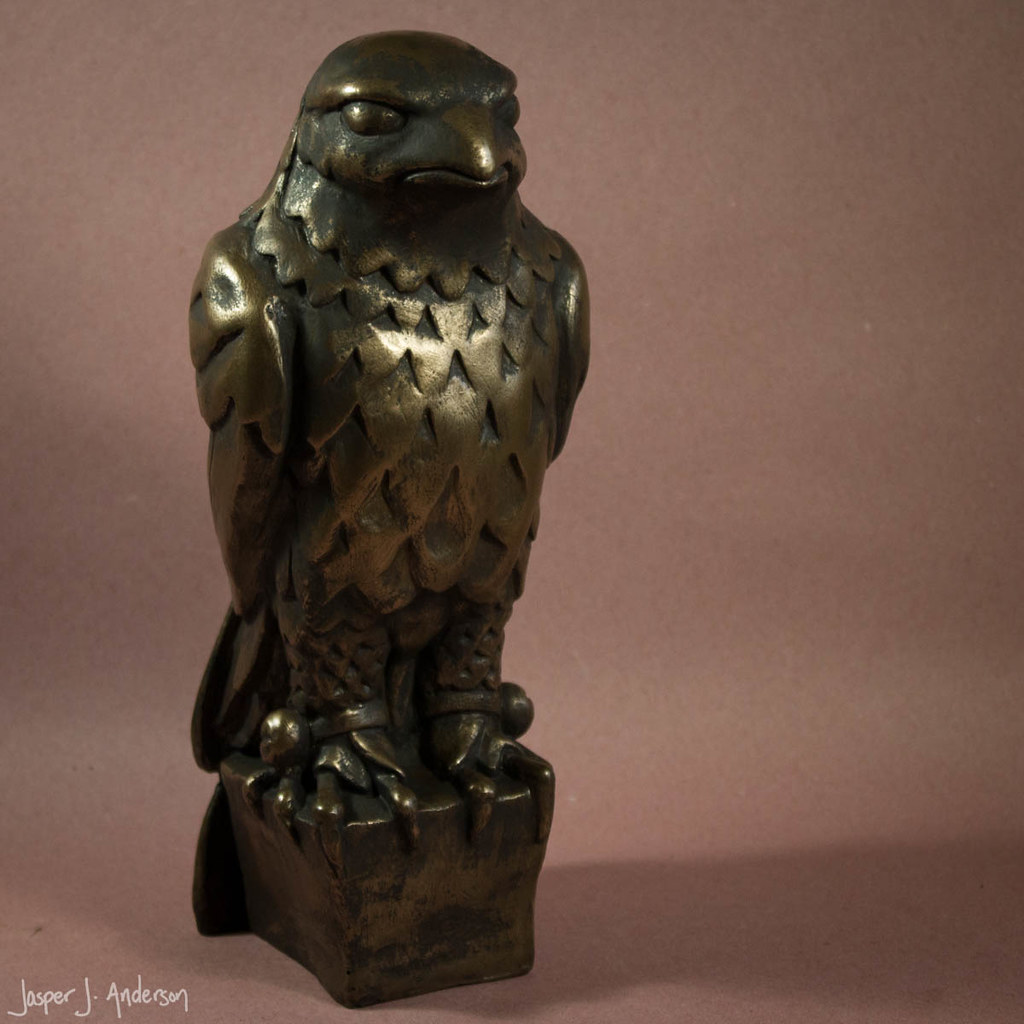
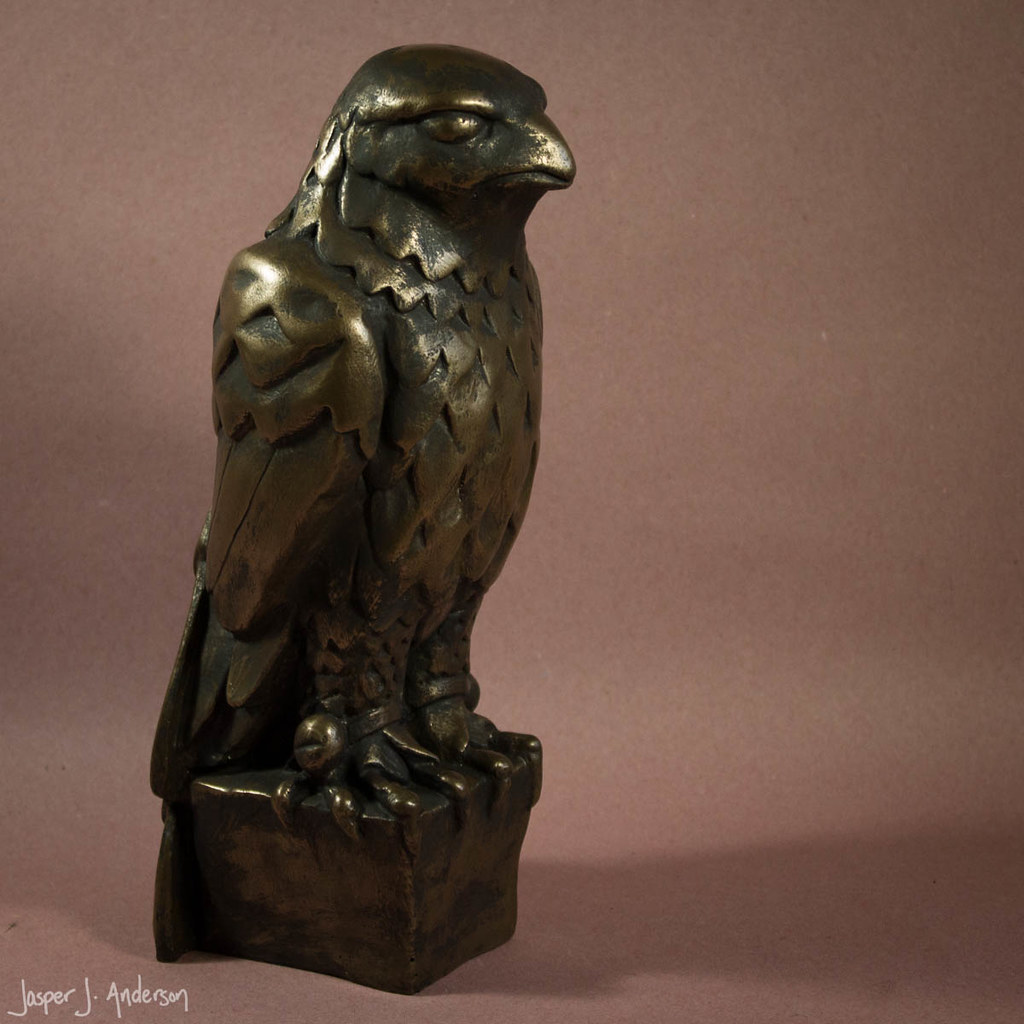
So I cast another copy.  This time, I wanted to do a bronze bird.  I can't tell what material the lead bird is covered with, but bronze seemed like a nice approximation, based on this image from the auction.


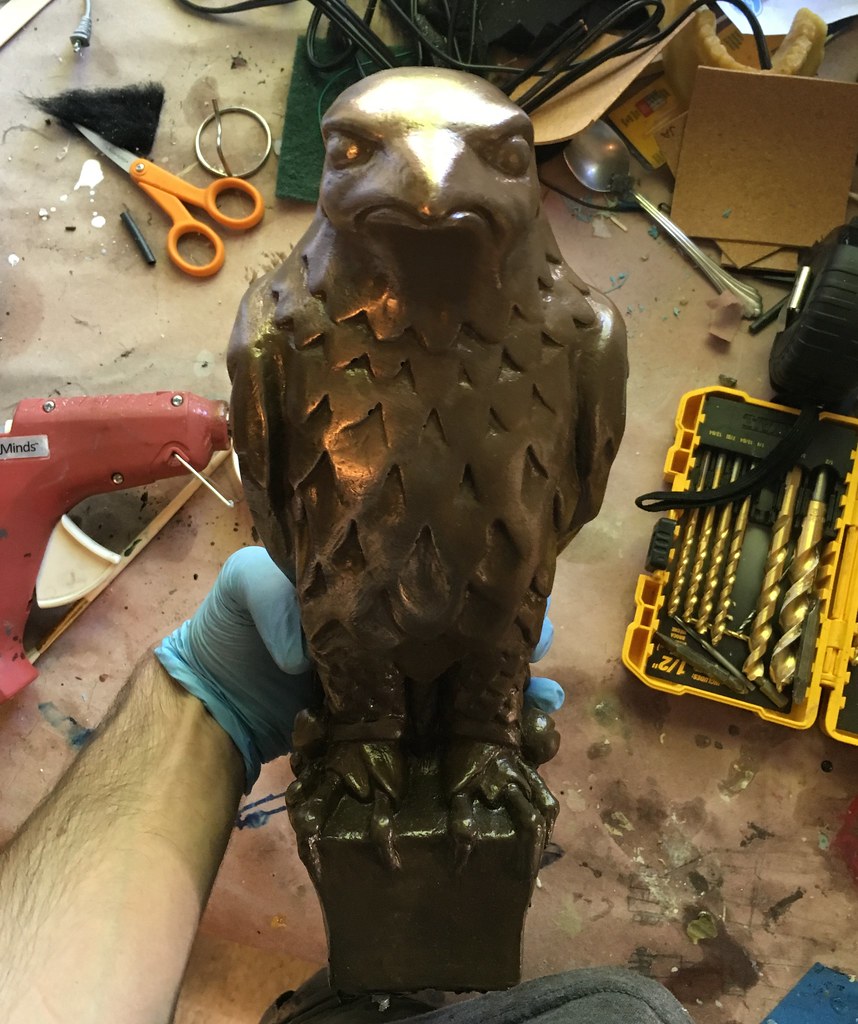
I went with a cold cast bronze process, rather than paint, because I wanted an extra element of authenticity.  Cold casting is basically putting a layer of metal on the surface of the cast resin part, rather than going to a foundry and actually pouring up molten metal.  I'm aware of two methods of cold casting.  First is to mix metal powder into the first layer of resin, then buff away the some of the resin to expose the metal particles.  The second is to dust the surface of the mold with metal powder, and back it with resin.  You can also do both in the same casting.  I tested both methods with the Smooth Cast Onyx and felt I got the most out of the second.

When the cold cast bronze bird came out of the mold, he was a sad brown bird.  The trick is to buff the surface with 0000 steel wool to bring out the shine.  Here I've polished the left side so you can (sort of) see the difference.


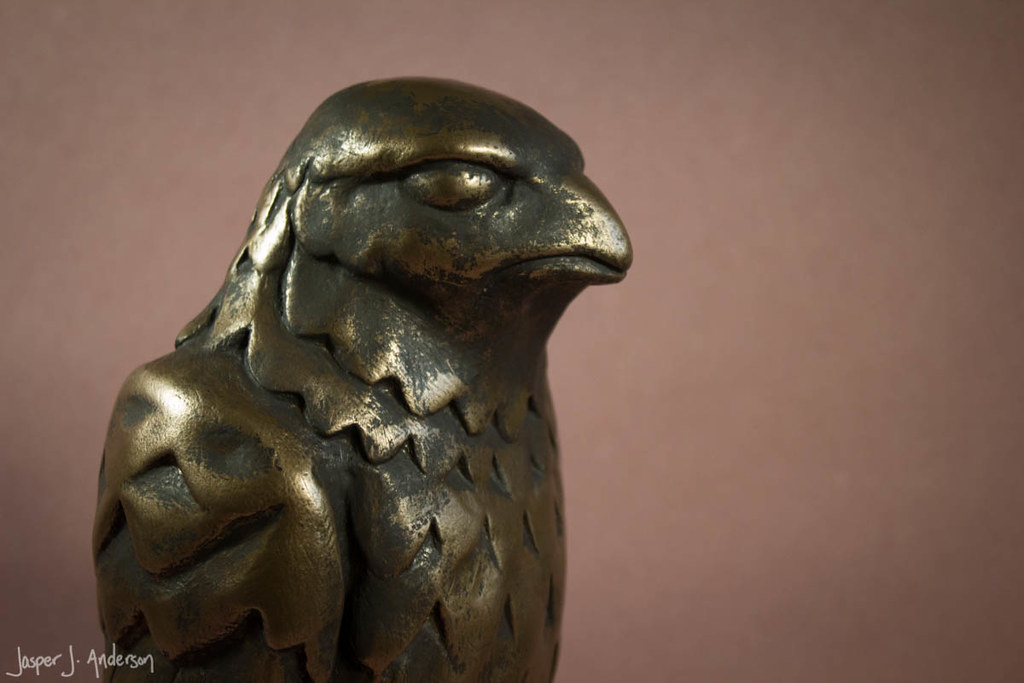
From there, I did a rub out (literally painting on and rubbing off) of black/brown acrylic.  I may have been a bit heavy handed with the paint, but it's easy to remove later because it's just sitting on top of the metal.


Is it perfect?  No.  But this one's mine.

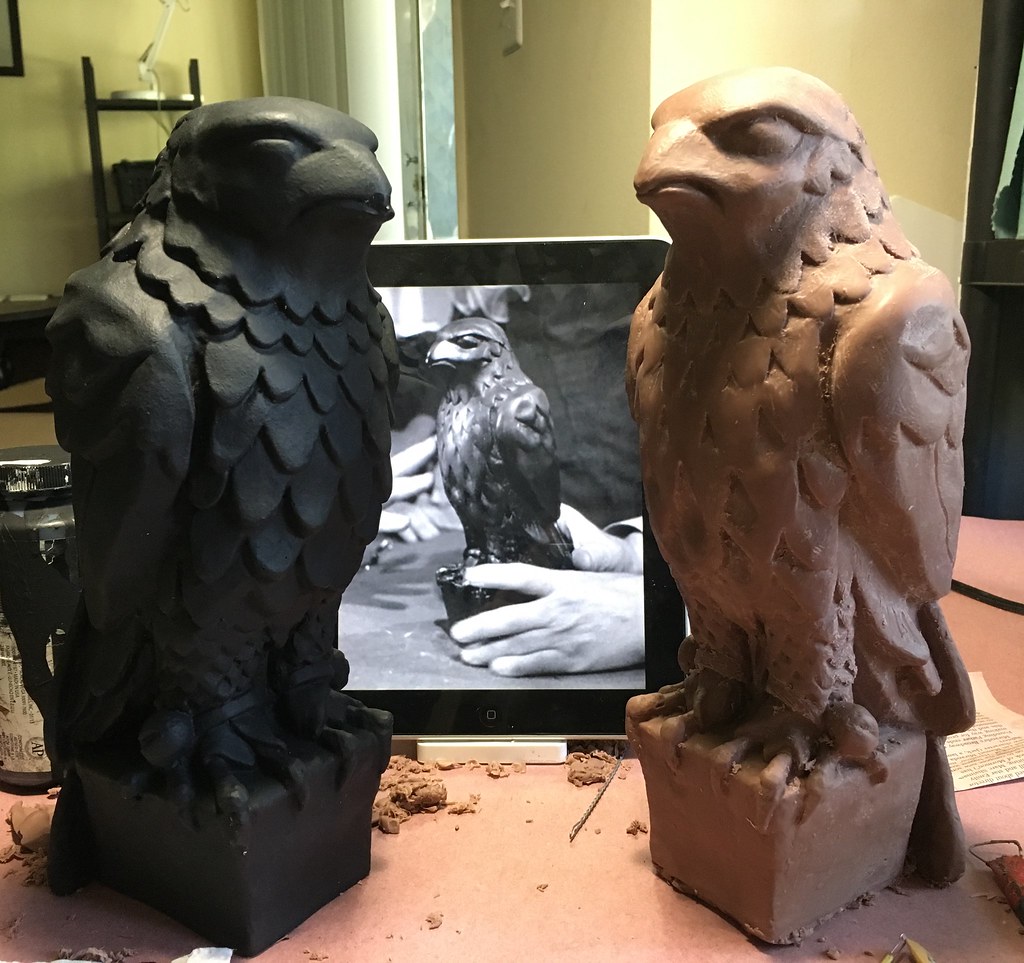
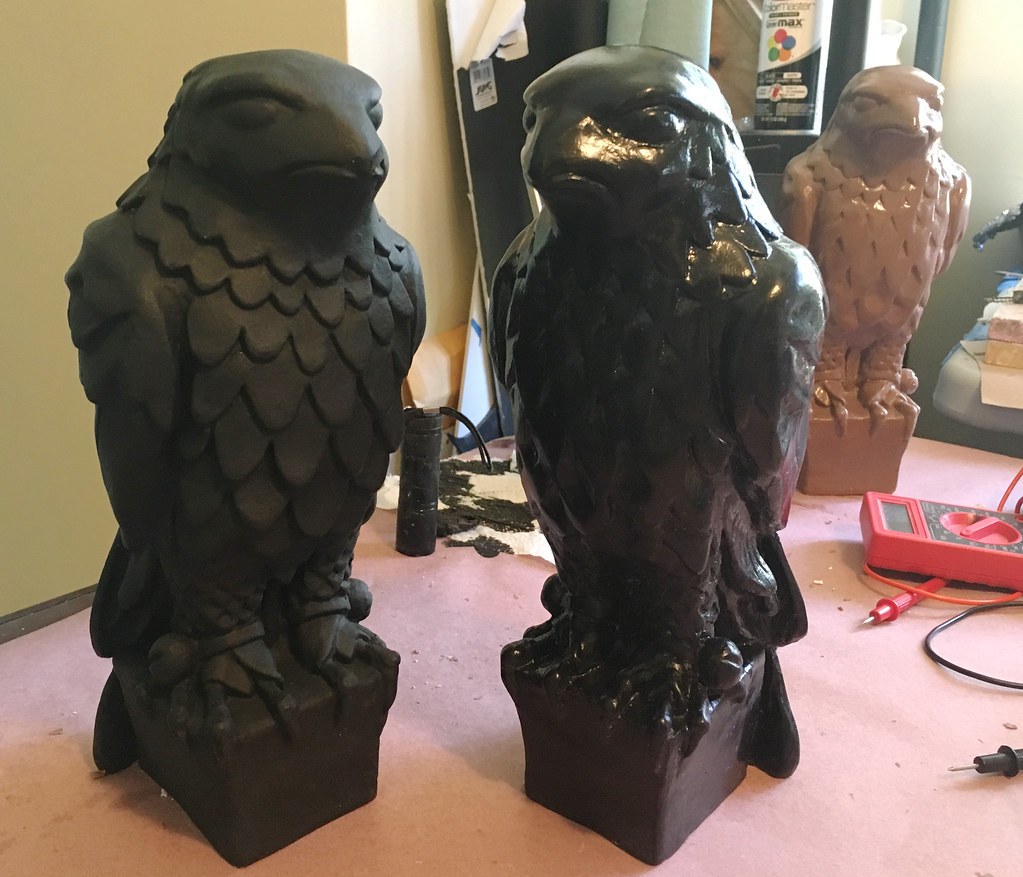
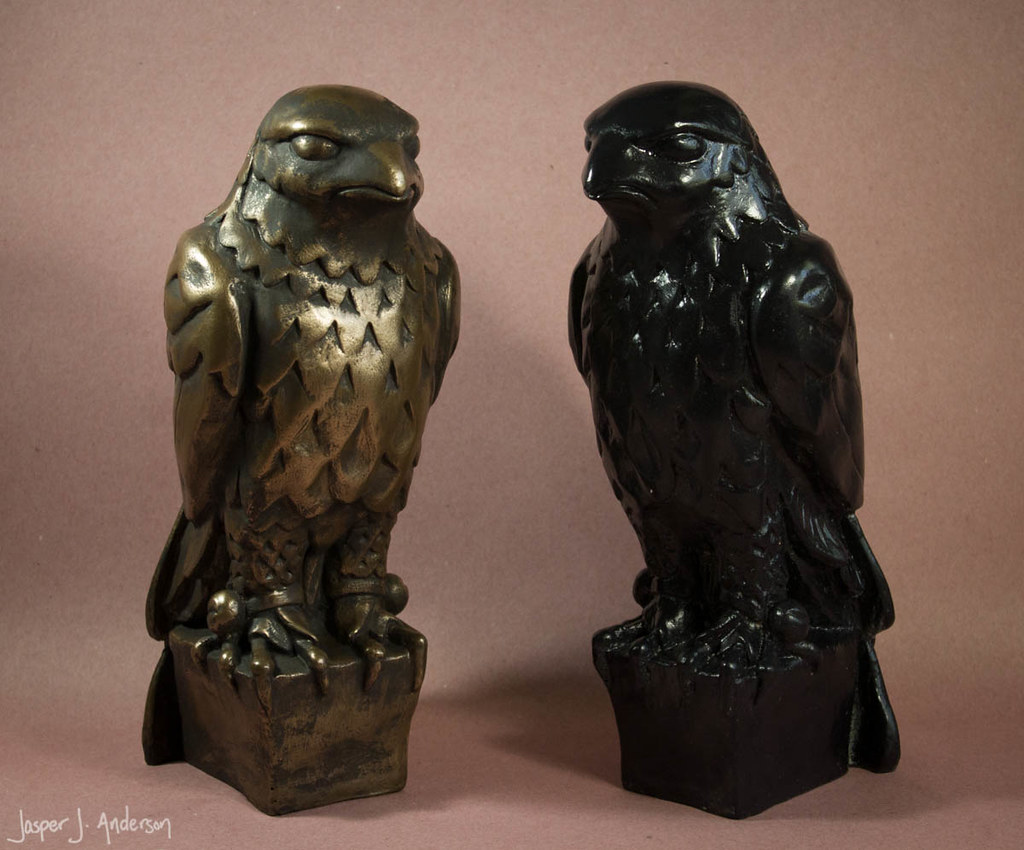
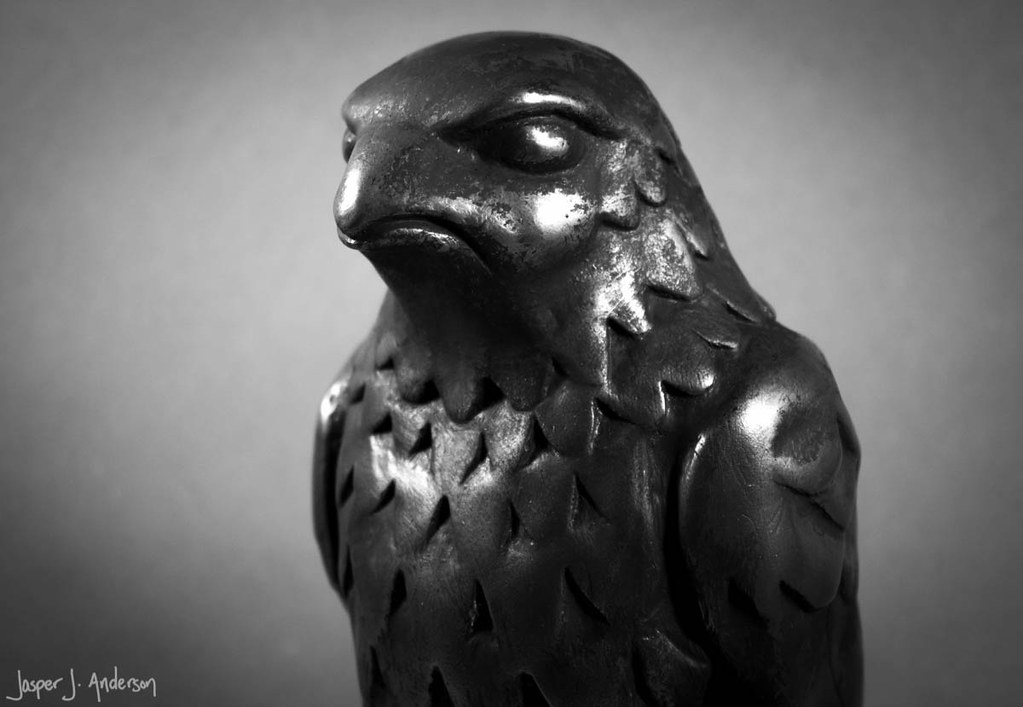
Here's the progression of plaster bird, clay bird, black bird, and bronze bird.


Much better.


Thursday, July 7, 2016

Wooden Skulls from the Mansion

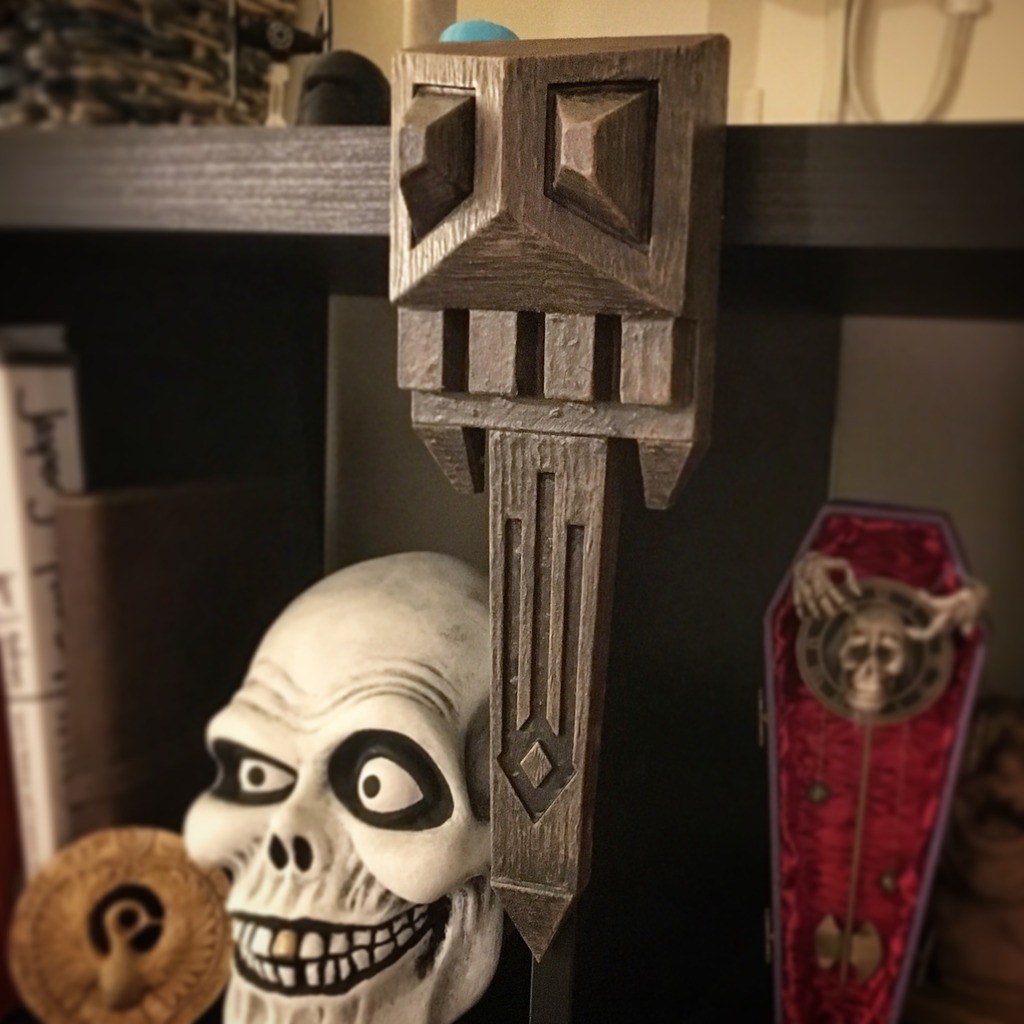
The Haunted Mansion has these great faux wooden skull mouldings in the portrait gallery when you exit the stretching room which, long story short, I needed to replicate.  I'll explain why in a later post.

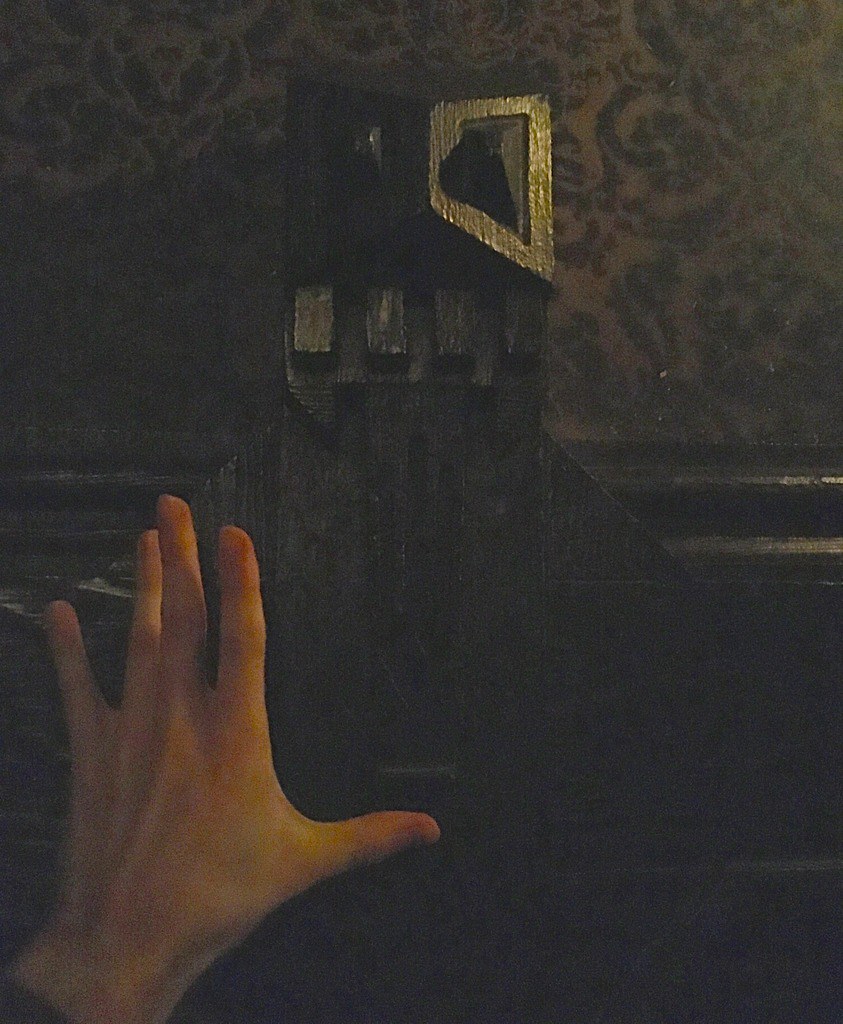
I visited the old house and took a lot of reference pictures of these, with my hand for scale.  It's remarkably difficult to get a good shot in the low lighting there, but I got enough information from these to...

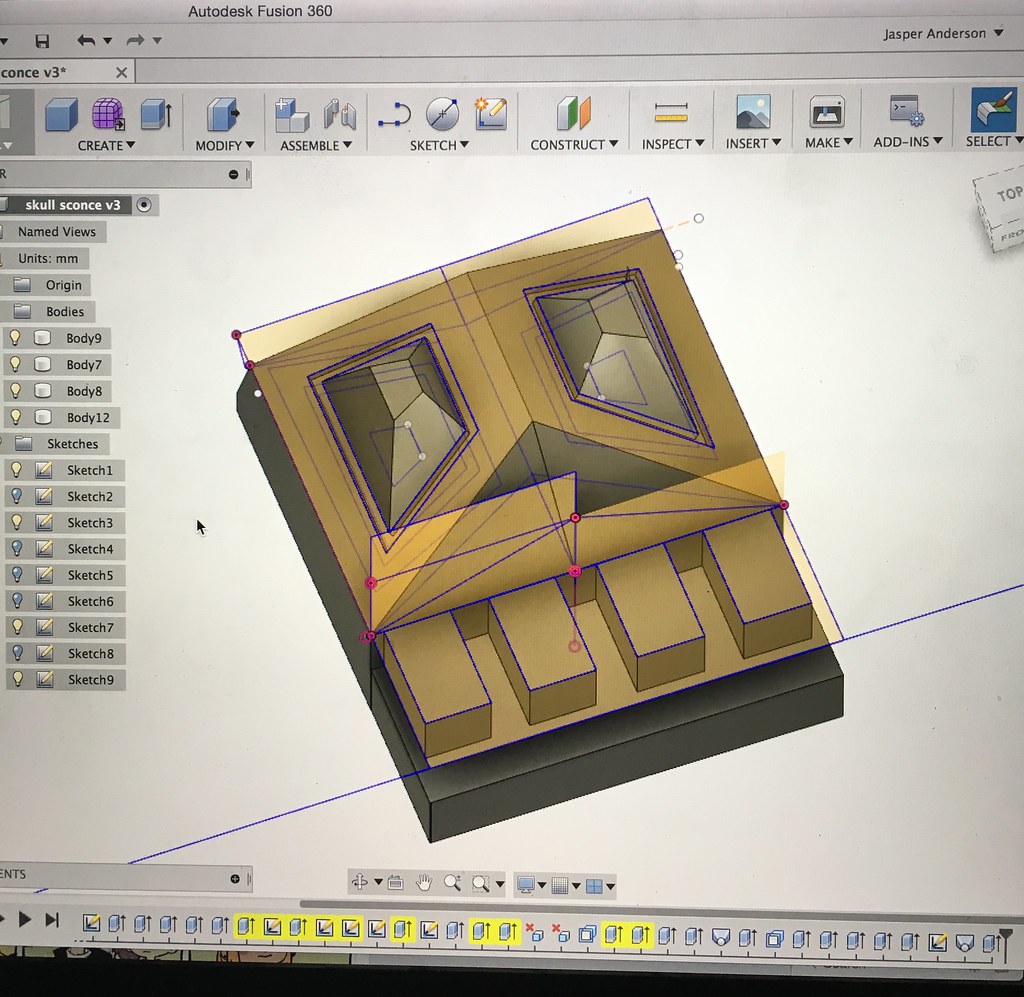
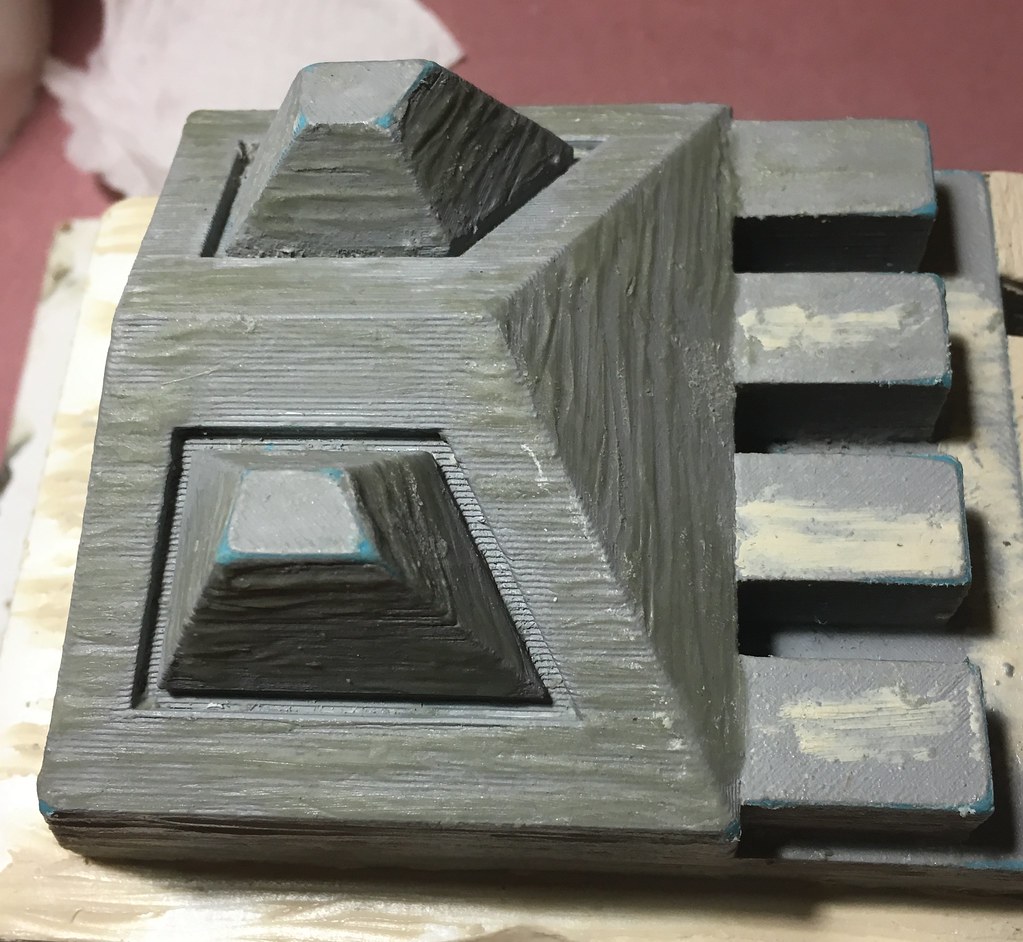
...Mock up a digital model.  I considered building this out of foam board or something of that sort, but I realized it was actually a prime candidate for 3D printing.  It's a geometric object that's just a little more complex than would be easy to figure out from traditional materials, especially the shapes around the eyes.  It was still tricky to do in the computer , since this isn't something I have much experience with, but ultimately it did take less time this way, and it's more precise than I'd have been able to do on my own.

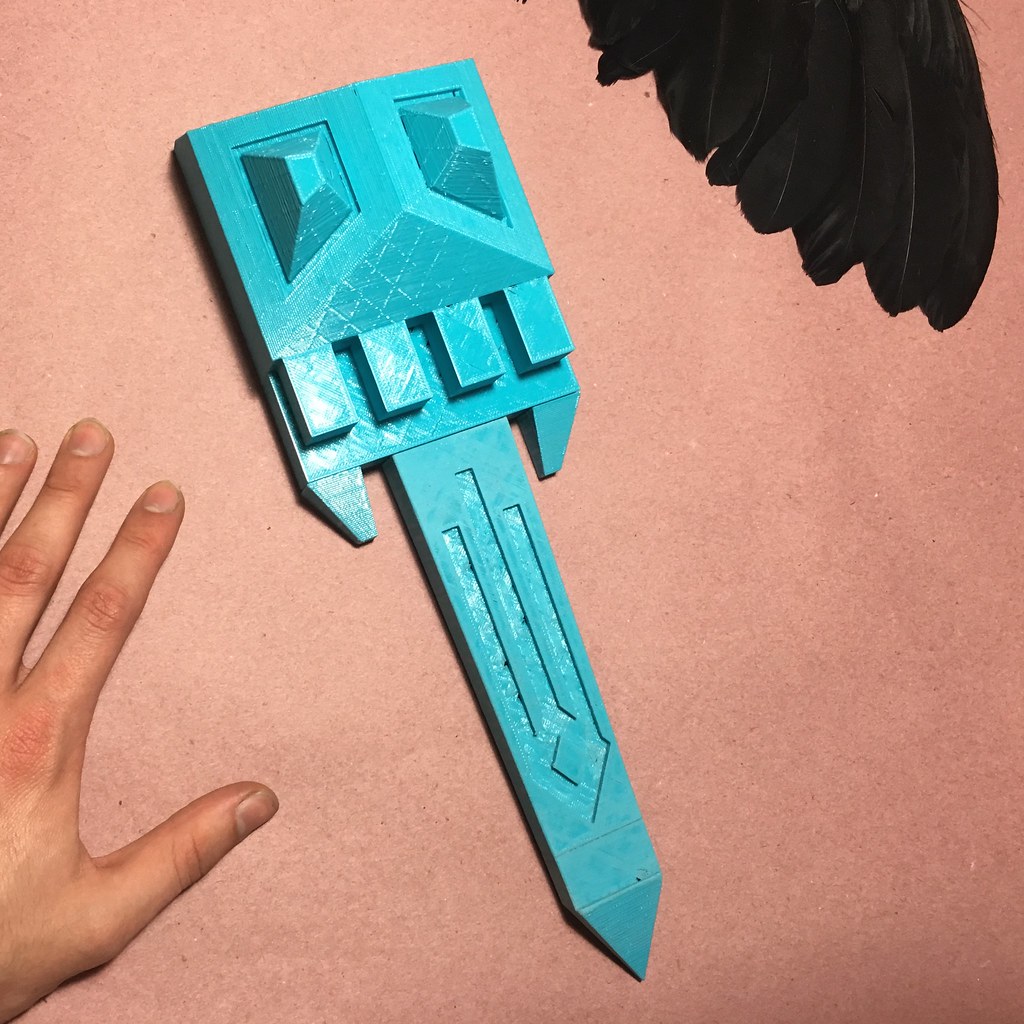
I set my Printrbot to make the parts while I was at work, then came home to assemble it.  I did it at about 75% of full size, because I just didn't need anything that big.


I used filler primer to help me sand out the grow lines, but I didn't get too picky, because I followed that up with some Apoxie Sculpt to add in the rough wood texture.  This is just before molding for that other project.

But I saved the original, and painted it up for my little display case.  I really enjoy projects like this.  A fairly quick turnaround, some new skills learned, and a cool prop I get to keep!


Thursday, May 19, 2016

The Ennis Tile

Meeting a Movie Star in Los Angeles

Maybe I don't go out enough, but since living in Los Angeles, I've encountered very few celebrities.  One time I walked past Seth Green near the Ikea in Burbank.  But this past weekend I made it a point to seek out a star I've long admired.  She's been in a couple of my favorite films-- The House on Haunted Hill (dir. William Castle, starring Vincent Price, 1959), and Blade Runner (dir. Ridley Scott, starring Harrison Ford, 1982).  And she's actually a house.


The Ennis House, built by Frank Lloyd Wright.  Perhaps the most curious geometric construction I've ever seen.  Those tiles you see behind Harrison Ford (though that's actually a recreation of the house for the interiors in the movie) are a unique design to this home that repeats all over the inside and outside.

I really wanted to see the house in person, and I found out that it's actually just below Griffith Park, and makes a rather nice stop on a walk through the area.  Bam.  There it is.


There are a lot of unique houses in the neighborhood, but the Ennis House certainly stands out.

And while I did come to admire the place, I also had a plan.  A plan that involved photos.  A lot of photos.

There are actually a lot of the signature Ennis House tile along the street, acting as a fence around the house.  I was surprised by how big they actually are.


Many are severely worn and crumbling, but some are in better shape.  A few are pristine replacements from the ongoing restoration of the house.  I picked out the cleanest of the original tiles and took about 90 different photos of it.  I then continued to the Griffith Observatory, looped back to the car, and returned home.

Autodesk has a remarkable piece of software called Memento that can stitch together a 3D model of just about anything if you provide it enough pictures that it can see all angles.  I imported all 90 images of the tile, and waited a couple hours for the software to work its magic.


You can't tell me that isn't cool.

Now, my real purpose for this is another project, but when I printed out a small sample version, I happened o notice it was the same size as a drink coaster.  Hmm... That actually ties in very nicely with Ford's character in Blade Runner.


So I checked to see if a glass would sit level on it.  It did.  Then I did what anyone else would do in the same situation.  I cleaned up the print to hide the layers (or "grow lines"), molded it in fashionably pink silicone, and cast up four copies in tinted ultracal stone with cork backings.


And the result... very satisfying.


Sunday, May 8, 2016

Making Dark Mark Temporary Tattoos

Hmm... what to wear to a "magical" themed party?

This was the question on our minds the night before, so my girlfriend and I needed to come up with something fast.  And that's when we said, why be a good wizard, when you can be evil??  We needed Dark Mark tattoos like the Death Eaters in Harry Potter.  But we didn't really care for the design from the movies, so we started sketching alternate versions.

sultry snake, anyone?

We liked the sideways skull, the snake body from the upper right, and the snake head from the upper left, so I did a ten minute photoshop and pulled together those elements, played with the color and contrast, and printed it out on tattoo transfer paper that we found at the local Hobby Lobby.  It's even the stuff that works with inkjet printers.


I printed four of them (just in case) and cut them cleanly off of the rest of the paper so we could still use it for other occasions down the road.  You lay and thoroughly press an acetate sheet over the paper, which sandwiches the ink in thin layers of plastic and adhesive, then peel off the acetate to reveal an adhesive layer, then apply it by pressing with a little water, just like a store bought temporary tattoo.  Seriously, it's that simple.  I was about to write this up as a tutorial, but it just works on its own.


Unfortunately the plastic layers are a little thick, so you can see it wrinkle, but for a last minute project, we were super pleased with it!