Sunday, July 28, 2013

Using the Vacuum Former

Some of you may have heard rumblings of a replacement in the works for the DIY Madame Leota projection effect I helped popularize a few years ago. Well, it's very close to complete, so I thought I'd share the progress.

I had two main issues with the Madame Leota effect. 1) It's Disney's, so it would never be truly "mine," no matter how well I replicated it. 2) It's practically impossible to replicate it perfectly, since, though the video is easy to find, projecting Leota's face onto anything but her actual head will result in some funky distortion.

The solution: build my own version from the ground up. 


You've already seen the first stage, my vacuum forming table. Here's what comes next.

The head form that I project onto needs to actually be the head of the actress in the projection video. So I made a plaster lifecast of her head, which comes out like this:


And then I modified it to suit a projected face, reducing detail to what needs to be there to register the face properly, and removing what would get in the way.


But I don’t want to project on a heavy plaster head form. I want a lightweight copy of it.


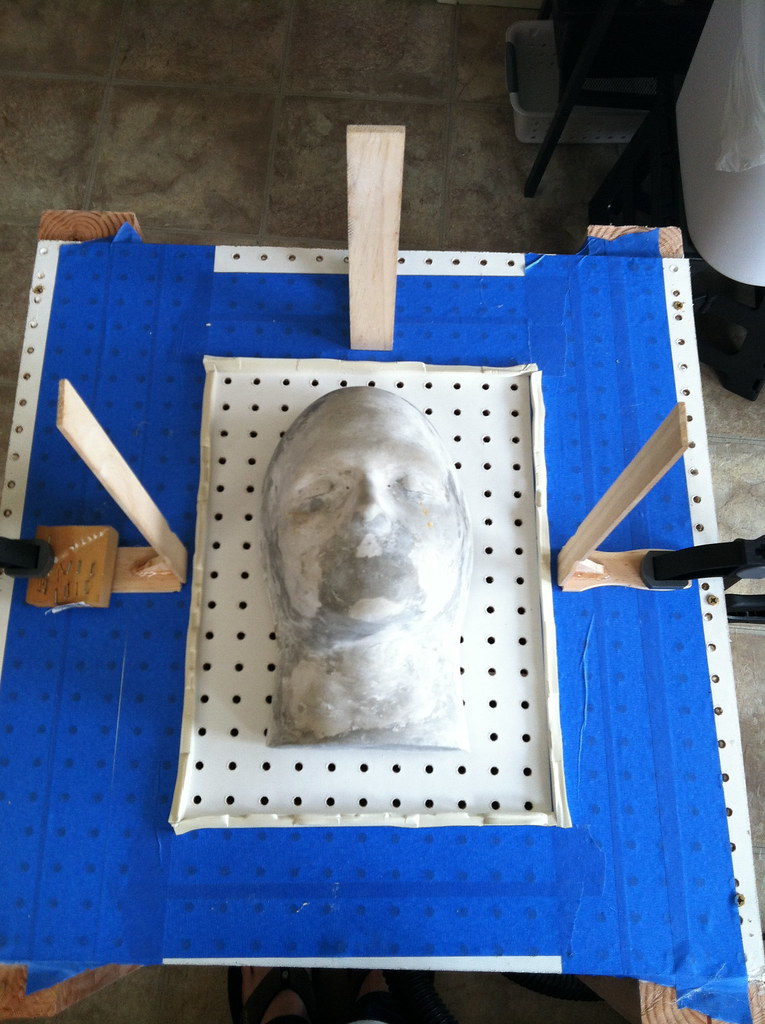
So I put the head form (called a “buck” in vacuum forming) on the table. The paint sticks are guides so I can put the frame into the right place.


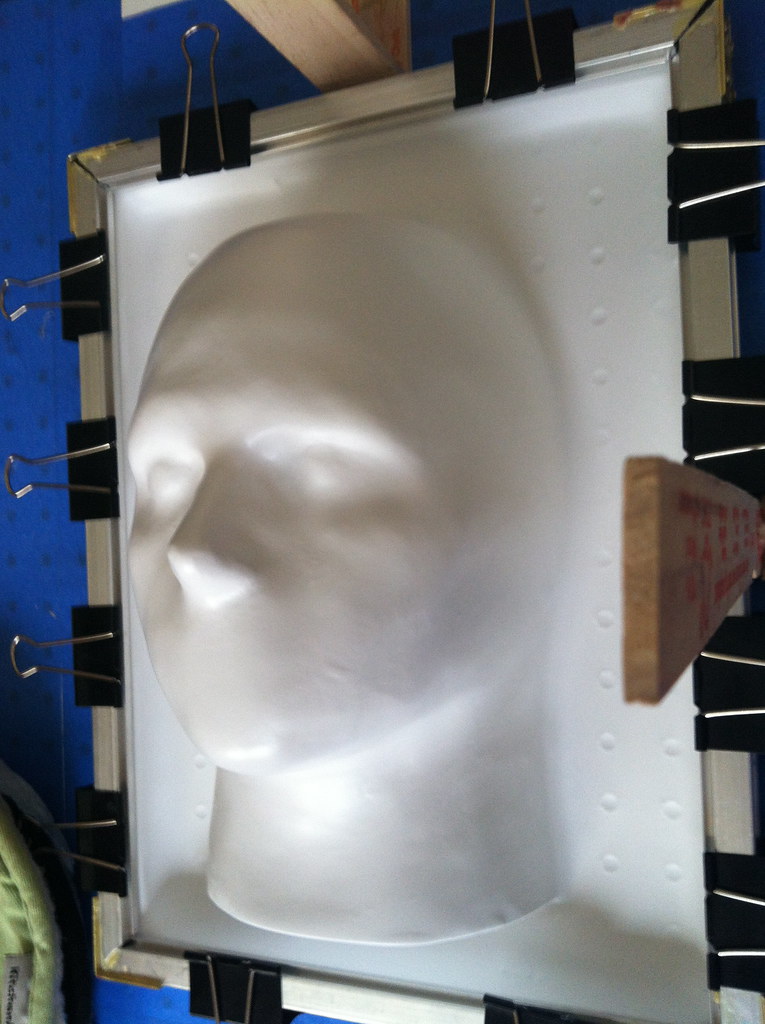
Then take the heated plastic out of the oven, press the frame down until the vacuum suction engages, and bam! A split second later, I have a lightweight, plastic head form to project onto.

Admittedly, it took a half dozen tries to get the machine figured out, but now that it's working, we're in business!
Wednesday, July 10, 2013

Vacuum Forming Table

I don't know about you, but I've always wanted a vacuum forming machine.  You take a sheet of plastic, heat it up, and shrink-wrap it over an object you want to copy.  If I had a dollar for every time I could have simplified a project by running off a thin plastic shell of something...well, I would have saved up enough to build one.  So I figured, that's a silly statistic, and I built one anyway.

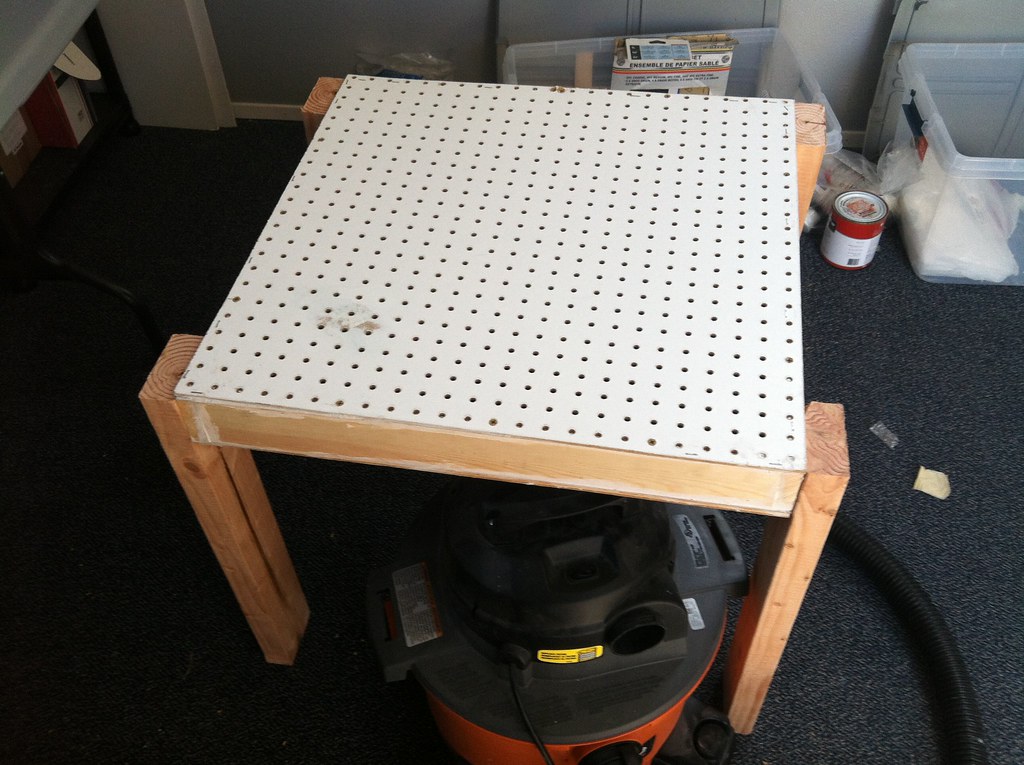
I'll be using the kitchen oven to heat the plastic, so I only needed to make the vacuum table.  The table is actually a box that hooks up to my shop vac, so it sucks the softened plastic down.  It's 2' square, with a pegboard top, 1x2 sides, and plywood for the bottom.  The legs are 2' 2x4s.

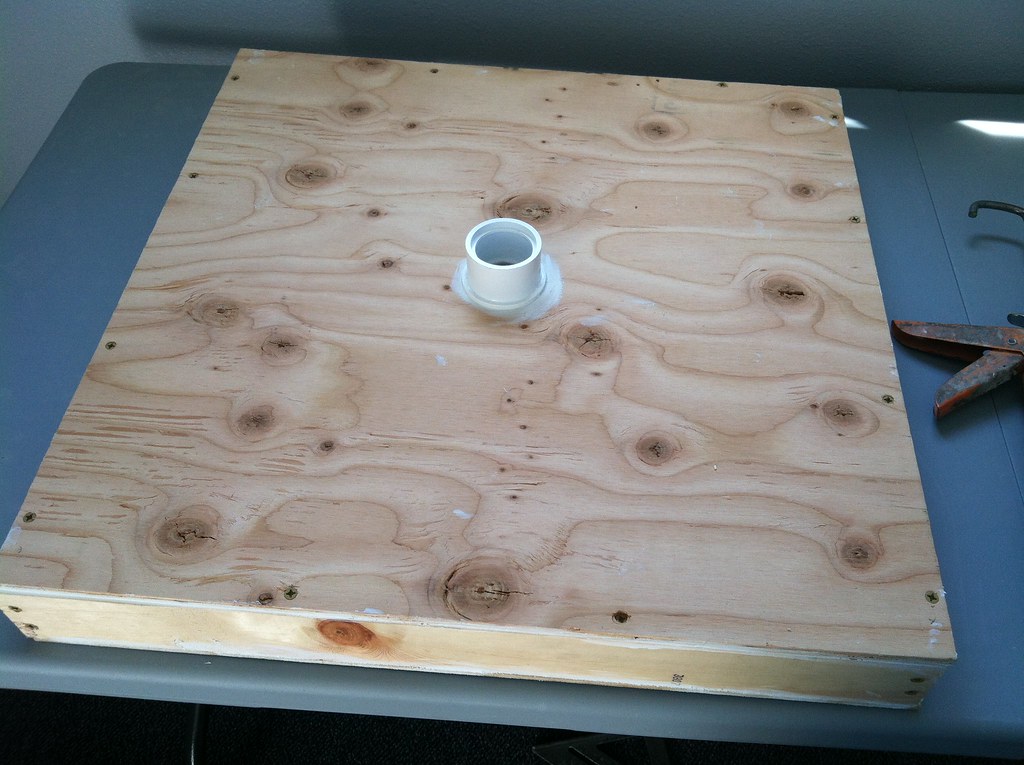
I found a PVC fitting that fits my shop vac hose perfectly.  It's some kind of reducer that I just adhered with caulk over a hole in the middle of the plywood.


It hooks up like this.


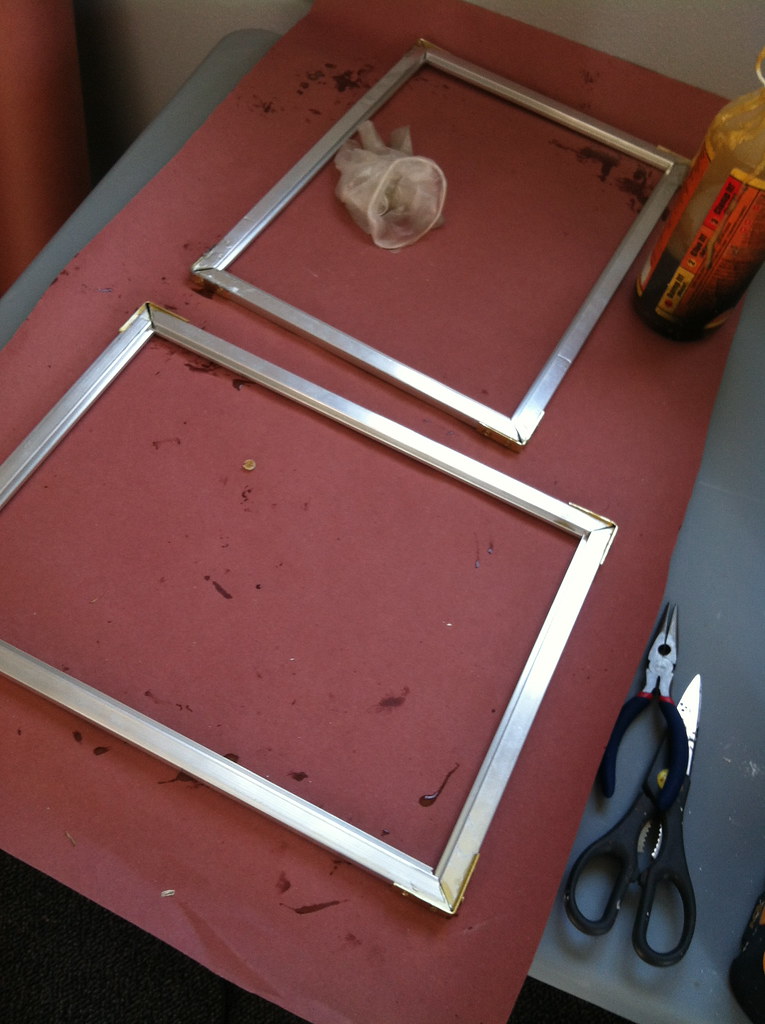
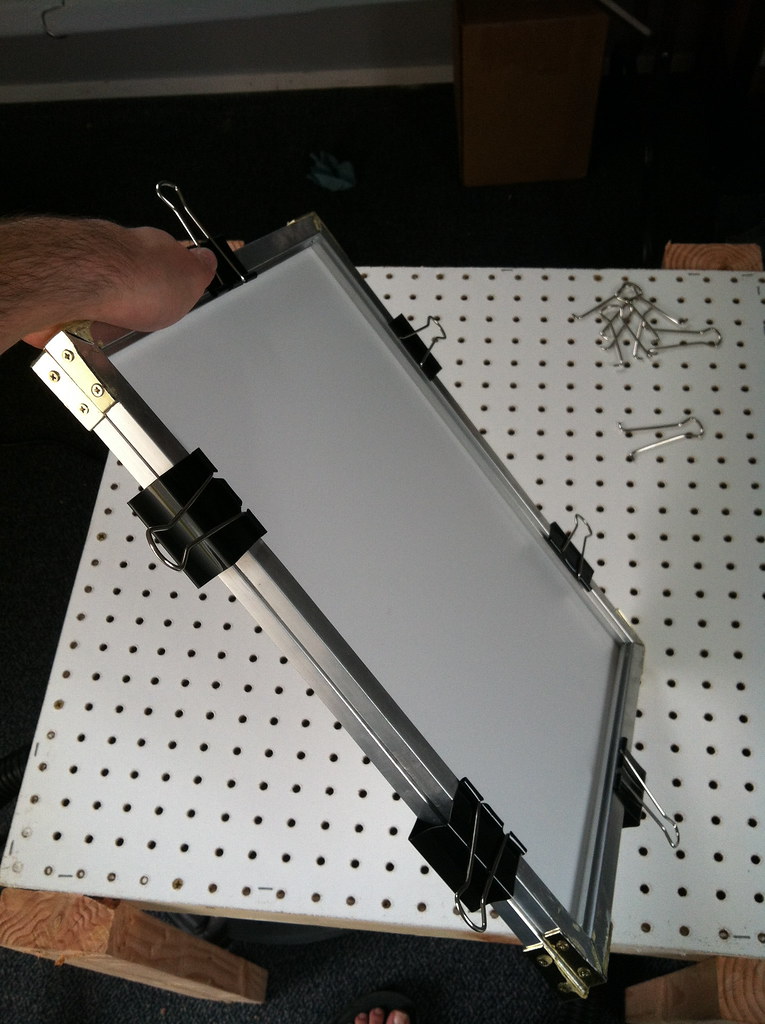
These are the frames that will hold the plastic.  Aluminum window screen frame stock made into 12 x 16" frames with L brackets and Gorilla Glue for good measure.  They'll get clamped on either side of the plastic sheet.


Like that.


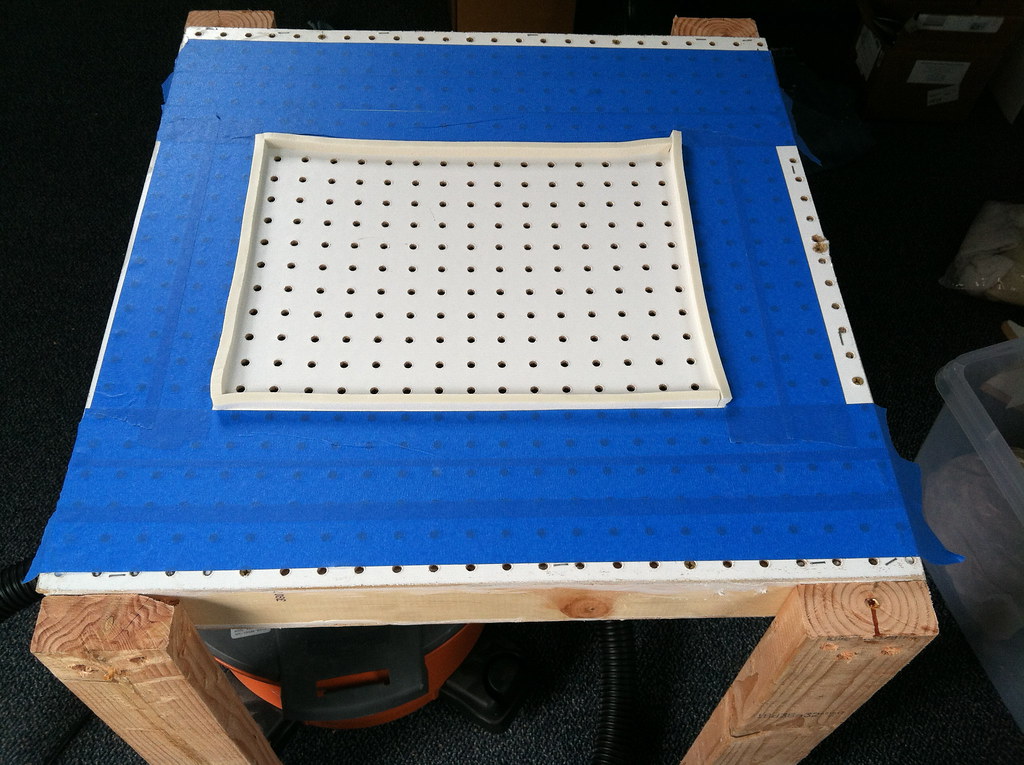
If you've been watching the numbers, you'll have noticed that my frames are smaller than my table.  I'm taping off the holes in the extra area of the table.  I wanted to make it bigger than I needed for future projects.

Now, I won't say what my first project with the vacuum former is yet, but I will tell you that it's related to the new projection effect.  Stay tuned, because in the next few days I'll put this thing to use.

Sunday, July 7, 2013

Small Haunted Tombstone Update (and More!)

The service that was previously providing the downloads for my Haunted Tombstone videos changed their format, and I didn't like how it looked, so I've switched over to a new service.  It's still totally protected through PayPal, just a little cleaner and easier to use.

What?  You haven't heard of my Haunted Tombstone?  Well head on over and check it out!


Next up, I have an all new projection effect in the works for this season!  Keep your eyes peeled, as I'll be revealing details soon.